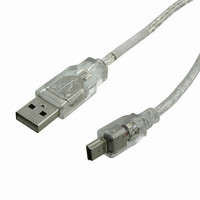
EXTMUSB3FT Matrix Orbital, EXTMUSB3FT Datasheet - Page 15

EXTMUSB3FT
Manufacturer Part Number
EXTMUSB3FT
Description
DISPLAY
Manufacturer
Matrix Orbital
Datasheet
1.EXTMUSB3FT.pdf
(21 pages)
Specifications of EXTMUSB3FT
Accessory Type
USB Cable
For Use With/related Products
GTT-480270A
Lead Free Status / RoHS Status
Lead free / RoHS Compliant
Other names
635-1045
5 Troubleshooting
5.1 Power
In order for your Matrix Orbital display to function correctly, it must be supplied with the appropriate
power. If the power LED near the top right corner of the board is not illuminated, power is not applied
correctly. Try the tips below.
5.2 Display
If your display is powered successfully without an AUTOEXEC file present, the Matrix Orbital logo, or user
created screen should display on start up. If this is not the case, check out these tips.
5.3 Communication
When communication of either text or commands is interrupted, try the steps below.
*Note:
11
I²C communication will always require pull up resistors on SCL and SDA of one to ten kilohms.
First, check the power cable which you are using for continuity. If you don't have an ohm
meter, try using a different power cable, if this does not help try a different power supply.
If changes have been made to the protocol select block, ensure all the appropriate protocol
select jumpers are connected and all unused protocol jumpers are disconnected.
The last step will be to check the power connector in use on your display. If the connector
has become loose or you are unable to resolve the issue, please use the Contact section to
reach a friendly Matrix Orbital support representative.
If any start-up issues are encountered, it is recommended that you remove the AUTOEXEC
file from the SD card to allow the unit to start with factory defaults.
First, check the communication cable for continuity. If you don't have an ohm meter, try
using a different communication cable. If you are using a PC try using a different Com Port.
In USB protocol, ensure that a connection is made to the header labelled USB, not Mass
Storage and check that the mode selection jumper is placed on the “B” side.
Next, please ensure that the display module is set to communicate on the protocol that you
are using, by checking the Protocol Select Jumpers.
In serial protocol, ensure that the host system and display module are both communicating
on the same baud rate. The default baud rate for the display module is 115,200 bps.
Match Rx from the display to the transmit pin from your host and the Tx pin to receive.
If you are communicating to the display via
the correct address. The default slave address for the display module is 80.
In I
Unlock the display. See the Set and Save Data Lock command for more info.
2
C mode, connect SDA to the data line of your controller and SCL to the clock output.
I²C*
please ensure that the data is being sent to


