MCP3901EV-MCU16 Microchip Technology, MCP3901EV-MCU16 Datasheet - Page 22
MCP3901EV-MCU16
Manufacturer Part Number
MCP3901EV-MCU16
Description
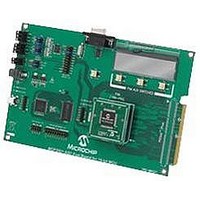
BOARD EVAL FOR 2CH ADC MCP3901
Manufacturer
Microchip Technology
Datasheets
1.MCP3901A0-ISS.pdf
(60 pages)
2.MCP3901A0-ISS.pdf
(30 pages)
3.MCP3901EV-MCU16.pdf
(38 pages)
4.MCP3901EV-MCU16.pdf
(38 pages)
Specifications of MCP3901EV-MCU16
Number Of Adc's
2
Number Of Bits
24
Data Interface
SPI™
Inputs Per Adc
1 Differential
Input Range
±1 V
Voltage Supply Source
Analog and Digital
Operating Temperature
-40°C ~ 85°C
Utilized Ic / Part
MCP3901
Silicon Manufacturer
Microchip
Application Sub Type
ADC
Kit Application Type
Data Converter
Silicon Core Number
MCP3901, PIC24F, PIC24H, DsPIC33, PIC18F86J55
Kit Contents
Board
Lead Free Status / RoHS Status
Lead free / RoHS Compliant


MCP3901 ADC Evaluation Board for 16-Bit MCUs User’s Guide
3.2
3.3
3.4
3.5
DS51845B-page 22
SETTING THE CONFIGURATION OF THE ADC
CONNECTIVITY AND RECORDING LENGTH
SCOPE PLOT WINDOW - TIME DOMAIN ANALYSIS
HISTOGRAM WINDOW – NOISE ANALYSIS
The MCP3901 Data View sets up the configuration registers of the MCP3901 by putting
the desired value on the “Write Registers” tab. Usually, it takes a few seconds to update
the MCP3901 configuration. To learn the configuration of the MCP3901 without chang-
ing it, click on the “Read Registers” tab and the same image as in “Write Registers” will
display. The difference is that the controls will be indicators, and the user cannot
change the values, but can only read the setup of the MCP3901.
The PC is connected to the MCP3901 ADC Evaluation Board for 16-Bit MCUs through
the RS232 cable. It is important to have a COM port on the PC. It is also possible to
use a USB to RS232 adaptor cable, but the user will need to note the number of the
virtual COM port. To do this, right click on My computer > Manage > Device Manager
> Port (COM and LPT), and read the number in parenthesis after the device name. The
COM port number must be selected in the “VISA Resource Name” field.
The MCU sends a large package of data to the PC. If the user only needs to see a small
part of the buffer, define the desired buffer length in the “Buffer Length” field. The
maximum length is 512 samples.
The average control can be used to view the impact of averaging over the ADC
accuracy. The number of points in the waveform graph will be less than the number
written in the “Buffer Length” control by a ratio equal with the value of the average. A
value equal to zero will cause an error. A value of ‘1’ means that no averaging is done.
When the program is opened for the first time, the value from the controls will have
some default values. The user must set up the communication port before starting the
acquisition by pressing the START button. To stop the acquisition, press the STOP but-
ton. Close the MCP3901 Data View application by clicking the “X” in the upper right
corner of the window.
The recorded samples from a buffer are indicated on the “Waveform Graphs” screens.
The size of the X axis is given by the number written in the “Buffer Length” field. On the
Y axis, the LSBs are indicated. To scale the time axis, it is necessary to modify either
the buffer length (the number of points indicated in the waveform graph), or to change
the sampling rate of the ADC.
The sampling rate of the ADC can be changed from the “Sampling Speed Control” box.
Writing a small value will achieve a high sampling rate. The correct value of the sam-
pling rate is indicated in the “Sampling Speed Indicator”. The highest sampling speed
that can be obtained is 55 ksps by setting: OSR = 32, Addr Loop = ALL and Sampling
Speed Control = 5.
For the evaluation of the Effective Number Of Bits (ENOB), the GUI will compute a few
statistical parameters: the mean value, standard deviation, and variance for each chan-
nel. These parameters display at the bottom of the GUI, under the Histogram Graph
screens. The formula used for the ENOB in the case of a DC signal is seen in
Equation 3-1, if the application indicates the acquired data on 16 bits.
EQUATION 3-1:
ENOB
=
16 log
–
2
2010 Microchip Technology Inc.
Related parts for MCP3901EV-MCU16
Image
Part Number
Description
Manufacturer
Datasheet
Request
R

Part Number:
Description:
Manufacturer:
Microchip Technology Inc.
Datasheet:
Part Number:
Description:
Manufacturer:
Microchip Technology Inc.
Datasheet:
Part Number:
Description:
Manufacturer:
Microchip Technology Inc.
Datasheet:
Part Number:
Description:
Manufacturer:
Microchip Technology Inc.
Datasheet:
Part Number:
Description:
Manufacturer:
Microchip Technology Inc.
Datasheet:
Part Number:
Description:
Manufacturer:
Microchip Technology Inc.
Datasheet:
Part Number:
Description:
Manufacturer:
Microchip Technology Inc.
Datasheet:
Part Number:
Description:
Manufacturer:
Microchip Technology Inc.
Datasheet: