DV164037 Microchip Technology, DV164037 Datasheet - Page 16
DV164037
Manufacturer Part Number
DV164037
Description
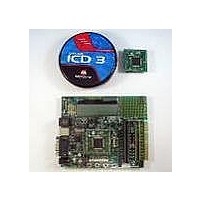
KIT EVAL ICD3 WITH EXPLORER 16
Manufacturer
Microchip Technology
Series
MPLAB® ICD 3r
Type
MCUr
Datasheet
1.DV164037.pdf
(50 pages)
Specifications of DV164037
Contents
2 Boards, ICD3 Debugger
Processor To Be Evaluated
PIC24F, PIC24H, dsPIC33
Data Bus Width
16 bit
Interface Type
RS-232, USB
Operating Supply Voltage
9 V
Silicon Manufacturer
Microchip
Core Architecture
PIC
Core Sub-architecture
PIC24, DsPIC33
Silicon Core Number
PIC24F, DsPIC33F
Silicon Family Name
PIC24FJxxGAxxx, DsPIC33FJxxGPxxx
Lead Free Status / RoHS Status
Lead free / RoHS Compliant
For Use With/related Products
PIC24F, PIC24H, dsPIC33
Lead Free Status / Rohs Status
Lead free / RoHS Compliant
Available stocks
Company
Part Number
Manufacturer
Quantity
Price
Company:

Part Number:
DV164037
Manufacturer:
MICROCHIP
Quantity:
12 000


2.4
© 2005 Microchip Technology Inc.
CREATING THE PROJECT
The first step is to create a project and a workspace in MPLAB IDE. Typically, there is
one project in one workspace.
A project contains the files needed to build an application (source code, linker script
files, etc.) along with their associations to various build tools and build options.
A workspace contains one or more projects and information on the selected device,
debug tool and/or programmer, open windows and their location and other MPLAB IDE
configuration settings.
MPLAB IDE contains a Project Wizard to help create new projects. Before starting,
create a folder named Tutorial for the project files for this tutorial (C:\Tutorial is
assumed in the instructions that follow). From the Example Code\Tutorial Code
directory on the Explorer 16 Development Kit Software CD-ROM, copy all of the source
files into this folder.
2.4.1
1. Start MPLAB IDE.
2. Close any workspace that might be open ( File > Close Workspace ).
3. From the Project menu, select Project Wizard.
4. From the Welcome screen, click Next > to display the Project Wizard Step One
FIGURE 2-1:
5. From the Device drop-down list, select “PIC24FJ128GA010” or
Note:
Note:
dialog (Figure 2-1).
“dsPIC33FJ256GP710PS”, depending on the PIM being used. Click Next >. The
Project Wizard Step Two dialog will be displayed (see Figure 2-2).
Select a Device
These instructions presume the use of MPLAB IDE 7.22 or newer.
The screen shots in the following sections show the PIC24 tutorial. Except for
displayed file names, the screens for the dsPIC33F tutorial will be identical.
Explorer 16 Programming Tutorial
SELECTING THE DEVICE
DS51589A-page 12
Related parts for DV164037
Image
Part Number
Description
Manufacturer
Datasheet
Request
R

Part Number:
Description:
Manufacturer:
Microchip Technology Inc.
Datasheet:
Part Number:
Description:
Manufacturer:
Microchip Technology Inc.
Datasheet:
Part Number:
Description:
Manufacturer:
Microchip Technology Inc.
Datasheet:
Part Number:
Description:
Manufacturer:
Microchip Technology Inc.
Datasheet:
Part Number:
Description:
Manufacturer:
Microchip Technology Inc.
Datasheet:
Part Number:
Description:
Manufacturer:
Microchip Technology Inc.
Datasheet:
Part Number:
Description:
Manufacturer:
Microchip Technology Inc.
Datasheet:
Part Number:
Description:
Manufacturer:
Microchip Technology Inc.
Datasheet: