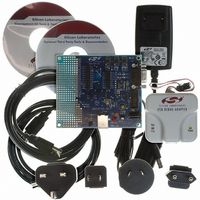
C8051F326DK Silicon Laboratories Inc, C8051F326DK Datasheet - Page 5

C8051F326DK
Manufacturer Part Number
C8051F326DK
Description
KIT DEV FOR C8051F326/7
Manufacturer
Silicon Laboratories Inc
Type
MCUr
Specifications of C8051F326DK
Contents
Evaluation Board, Power Supply, USB Cables, Adapter and Documentation
Processor To Be Evaluated
C8051F326/F327
Interface Type
USB
Silicon Manufacturer
Silicon Labs
Core Architecture
8051
Silicon Core Number
C8051F326
Silicon Family Name
C8051F32x
Lead Free Status / RoHS Status
Contains lead / RoHS non-compliant
For Use With/related Products
Silicon Laboratories C8051F326, C8051F327
Lead Free Status / Rohs Status
Lead free / RoHS Compliant
Other names
336-1306
5.3.1. Setting-up the Firmware
5.3.2. Installing the USB Driver
5.3.3. Running the Host Application
Note: The C8051F320 target board has the ability to be powered through the USB cable. To enable the USB powered mode,
1. Set up the hardware on the C8051F320 target board according to the instructions in Section 2.
2. Create a project using the following steps.
3. Begin program execution on the target by either of the following methods:
1. Connect the USB cable between the host computer and the C8051F320 target board, as shown in
2. At this point, Windows should notify you it has found new hardware and prompt you with a Found New
3. Select Search for a suitable driver for my device (recommended) and press the Next button.
4. Select Specify a location under “Optional search locations:” and press the Next button.
5. Press the Browse button to locate the SiLabsInt.inf driver installation file, located by default in the
6. Verify that the correct path and filename are shown and press the Next button.
7. Press the Finish button.
1. Once firmware has been downloaded to the target board and the driver has been installed successfully, run
2. The USBTest application will display the status of the potentiometer, the temperature sensor, the two
3. The application also includes check boxes for turning on the two LEDs and changing the logic levels on the
4. If any of the application functions do not operate correctly, verify shorting blocks are installed at the follow-
5. See Figure 2 on page 6 for the location of headers, LEDs, switches, and potentiometer.
move the shorting block located at header J2 to header J11.
a. Open the Silicon Laboratories IDE.
b. Click on the Project
c. Answer No to the following message:
d. Select the USB__Int.wsp project, located by default in the SiLabs\MCU\Exam-
e. Click the Build/Make Project button in the IDE toolbar.
f.
g. Connect to the device by clicking the Connect button on the IDE toolbar.
h. Download the project to the target by clicking the Download Code button in the IDE toolbar.
a. Click the Go button in the IDE toolbar.
b. Disconnect the IDE from the device by pressing the Disconnect button on the toolbar. Next, press
Figure 1. See Figure 2 on page 6 for the location of the USB connector.
Hardware wizard. Press the Next button.
“SiLabs\MCU\Examples\C8051F320\C\USB_INT” directory. Once this file is selected press the OK button.
the
ples\C8051F320\C\USB_INT” directory.
switches, and the lower four bits of Port 0.
lower four bits of Port 1.
ing positions: J3[1-2] (P2.0 Switch), J3[3-4] (P2.1 Switch), J3[5-6] (P2.2 LED), J3[7-8] (P2.3 LED), J9
(P0.2), J10 (P0.3) and J13 (P1.7 Potentiometer).
Not all project windows can be restored if not connected.
Do you want to connect now?
ples\C8051F32x\C\USB_INT directory, and click the Open button.
The project should now be compiled and linked successfully, with no errors.
the Reset button on the C8051F320 target board.
USBTest.exe
example
→
Open Project... option in the IDE menus.
application
Rev. 0.8
located
by
default
C8051F32x-DK
in
the
“SiLabs\MCU\Exam-
5


