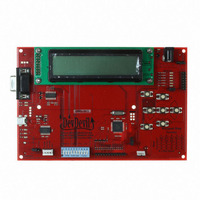
DD-DB1-AL202C-GW Matrix Orbital, DD-DB1-AL202C-GW Datasheet - Page 9

DD-DB1-AL202C-GW
Manufacturer Part Number
DD-DB1-AL202C-GW
Description
DEV BD 20X2 LCD GRY TXT WHT BL
Manufacturer
Matrix Orbital
Series
Dev Devilr
Datasheet
1.DD-PASC-PKG.pdf
(47 pages)
Specifications of DD-DB1-AL202C-GW
Main Purpose
Displays, LCD Display
Embedded
Yes, ASIC
Utilized Ic / Part
AL202C
Primary Attributes
20 x 2 Display, Gray Text White Background
Secondary Attributes
GUI, mini USB
Lead Free Status / RoHS Status
Lead free / RoHS Compliant
Other names
635-1038
I
The most advanced connection to the DevDevil is provided by the I
connecting to a controller and serial TTL capability is not available. It requires a connection directly to your project, best
accomplished using a breadboard and the included cable of the same name. Power is usually applied from the
breadboard, but can also be supplied directly to the DevDevil using the optional AC power adapter. To dive right into your
application and use the DeveDevil in I
2
Cables Required
C
1. Prepare the onboard jumpers.
2. Set the Protocol Select switches.
3. Make the connections.
4. Create.
i.
ii.
i.
i.
ii.
i.
Connect the Input Power side of the Input Select jumper, see highlight 6 in Illustration 2: DevDevil Basic
Connections..
Select the appropriate Voltage Select jumper placement according to input voltage supplied, see highlight 7
in Illustration 2: DevDevil Basic Connections..
Place the unit into I
remainder are down in the off position, see highlight 5 in Illustration 2: DevDevil Basic Connections..
Connect the breadboard cable header to the power/communication header on your DevDevil and plug the
four leads into your breadboard. The red lead will require power, while the black should be connected to
ground. The green and yellow should be connected to your controller clock and data lines respectively, see
highlight 2 in Illustration 2: DevDevil Basic Connections..
If required, power can be drawn from a wall source by removing the Voltage Select jumper. Place the output
power plug of your AC power adapter into the onboard barrel jack and connect the business end of the
device into an available wall socket, see highlight 4 in Illustration 2: DevDevil Basic Connections..
This time you're on your own. While there are many examples within the Matrix Orbital AppNote section,
www.matrixorbital.ca/appnotes,
in development, it's a breeze to switch over to another protocol, and fellow developers are always on our
forums, http://www.lcdforums.com/forums, for additional support.
BBC
Illustration 5: I
2
C protocol by moving switches 9 and 10 up into the on position, while ensuring the
2
C mode, get started with the guidelines below.
2
C Connection
too many controllers and languages exist to cover them all. If you get stuck
7
2
C protocol setting. This mode is usually used when
1 2 3 4 5 6 7 8 9 10
X X X X X X X X
Table 5: I
2
C Protocol Select
X
X


