Setup demo:
1. Open CodeWarrior for Microcontrollers. From Windows start menu,
2. Click on “Load Example Project” from CodeWarrior startup dialog.
3. From example projects menu, open tree to select: “ColdFire
4. Create a new project name (ex. Lab3), set desired location, and click
5. Launch Accelerometer Demo utility from Windows start menu:
6. Set port to USB COM.
7. Set Baud rate to 115200.
8. Turn board power switch to OFF position.
9. Make sure the red 32-bit ColdFire V1
10. Turn board power switch to ON position and close debugger window.
DEMOACKIT—Lab Tutorial
DEMOACKIT—Lab Tutorial
Embedded Microcontrollers
Flexis
Lab tutorial
you can locate it using the “Programs>Freescale CodeWarrior>CW
for Microcontroller V6.1>CodeWarrior IDE.exe” path.
V1>Evaluation Board Examples>DEMOAC>DEMO51AC256_
Accelerometer_test.”
“Create Project.” This will open the project for the Accelerometer
Application for the 32-bit AC256 microcontroller.
Programs>P&E Embedded Multilink Toolkit>Utilities>Accelerometer
Demo. *See DEMOAC User Manual for details on the Accelerometer
Demo utility.
is plugged in to board. Board jumpers should all be set to the default
settings shown in Quick Start Guide.
™
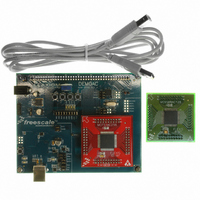
AC DEMOACKIT
®
MCF51AC256 daughter card
Accelerometer Demo running on 32-bit AC256 in data
averaging mode. The orange bar graph labeled “C” highlights
the bus cycles required to average the last 16 readings of
the 3 axes. The values shown in fourth column of text are the
number of bus cycles in hex.
Run demo on the 32-bit ColdFire V1:
1.
2. From Connection Manager menu, select “USB1:DEMOAC
3. From Erase and Program Flash menu, click on “Yes” to allow
button, launching Debugger.
(PEnnnnnnn)” port and click on “Connect (Reset).”
the debugger to mass erase the microcontroller’s on-chip flash
memory and program it with the new application.
Compile and program the 32-bit AC256 microcontroller
with Accelerometer Application by clicking on “Debug”
4.
5. Bring Accelerometer Demo utility to front and click the “Open Serial
6. Move board around to demonstrate 3-axis accelerometer.
7. Observe output in Accelerometer Demo utility.
8. Click button labeled “SW1” on board to enable data averaging. Move
9. Click button labeled “SW2” on board to enable data filtering. Move
Change device to 8-bit S08:
1. Click “Close Port” in Accelerometer Demo utility.
2. Close the “True-Time Simulator & Real-Time Debugger” window.
3. Bring CodeWarrior IDE window to front with Accelerometer Application
4.
5. From Wizard, change microcontroller selection from 32-bit
Freescale and the Freescale logo are trademarks or registered trademarks of Freescale Semiconductor, Inc.
in the U.S. and other countries. All other product or service names are the property of their respective owners.
© Freescale Semiconductor, Inc. 2008.
Agile Number: 926-77696
Doc Number: DEMOACLAB / REV 0
Run demo on 8-bit S08:
1.
2. From Connection Manager menu, select “DEMOAC on USB1
3. From Loader Warning menu, click on “OK” to allow the debugger to
4.
5. Bring Accelerometer Demo utility to front, click “Open Serial Port and
6. Move board around to demonstrate 3-axis accelerometer.
7. Observe output in Accelerometer Demo utility.
DEMOACKIT—Lab Tutorial
Port and Start Demo” button.
board.
board.
project for 8-bit microcontroller.
“MCF51AC256” to 8-bit “MC9S08AC128” in the “Flexis>AC Family”
tree. Make sure ‘P&E Multilink/Cyclone Pro’ is selected as the default
connection.
launching Debugger.
(Name=Pennnnnnn)” port and click on “Connect (Reset).”
mass erase the microcontroller’s on-chip flash memory and program
it with the new application.
Start Demo” button.
Click on the “Start/Continue (F5)” button in debugger to run
application.
Click the “MCU Change Wizard” button to switch project to
8-bit microcontroller.
Compile and program the 8-bit AC128 microcontroller with
Accelerometer Application by clicking on “Debug” button,
Click on “Start/Continue (F5)” button in debugger to run
application.
Learn More:
8. Click button labeled “SW1” on board to enable data averaging.
9. Click button labeled “SW2” on board to enable data filtering.
The accelerometer demo clearly shows the CPU
performance gains of the 32-bit ColdFire V1 CPU over the
8-bit S08 CPU. In the data averaging and data filtering
modes, a considerable amount of 16-bit and 32-bit math
is required. The S08 CPU is capable of performing these
tasks, but it requires a substantial portion of its bandwidth.
The ColdFire V1 CPU performs the same tasks with only a
very small portion of its bandwidth. Overall, the lab shows
that with Flexis AC microcontrollers, you can pick and
choose the CPU for your performance needs.
6. Click “Finish.” In the background, CodeWarrior will transform your
7. Turn board power switch to OFF.
8. Replace the 80-Pin LQFP 32-bit ColdFire
9. Turn board power switch to ON.
Accelerometer Demo running on 8-bit S08 AC128 in data
averaging mode. The orange bar graph labeled “C” highlights
the bus cycles required to average the last 16 readings of the 3
axes. The values shown in fourth column of text are the number
of bus cycles in hex.
Move board.
Move board.
project to the 32-bit microcontroller with no software changes
needed.
with an 80-Pin LQFP 8-bit S08 AC128 microcontroller in the
daughter card.
For more information about Freescale products,
please visit www.freescale.com/flexis
®
V1 AC256 microcontroller