AD9847AKST Analog Devices Inc, AD9847AKST Datasheet - Page 20
AD9847AKST
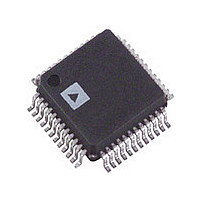
Manufacturer Part Number
AD9847AKST
Description
IC CCD SIGNAL PROC 10BIT 48-LQFP
Manufacturer
Analog Devices Inc
Type
CCD Signal Processor, 10-Bitr
Datasheet
1.AD9847AKSTZRL.pdf
(28 pages)
Specifications of AD9847AKST
Rohs Status
RoHS non-compliant
Input Type
Logic
Output Type
Logic
Interface
3-Wire Serial
Mounting Type
Surface Mount
Package / Case
48-LQFP
Analog Front End Type
CCD
Analog Front End Category
Video
Interface Type
Serial (3-Wire)
Sample Rate
40MSPS
Input Voltage Range
0.5V
Operating Supply Voltage (min)
2.7/3V
Operating Supply Voltage (typ)
3.3/5V
Operating Supply Voltage (max)
3.6/5.5V
Resolution
10b
Number Of Adc's
1
Power Supply Type
Analog/Digital
Operating Temp Range
-20C to 85C
Operating Temperature Classification
Commercial
Mounting
Surface Mount
Pin Count
48
Package Type
LQFP
Number Of Channels
1
Current - Supply
-
Lead Free Status / RoHS Status
Not Compliant
Available stocks
Company
Part Number
Manufacturer
Quantity
Price
Company:

Part Number:
AD9847AKST
Manufacturer:
AD
Quantity:
1 831
Company:
Part Number:
AD9847AKST
Manufacturer:
ADI
Quantity:
244
Part Number:
AD9847AKST
Manufacturer:
ADI/亚德诺
Quantity:
20 000
Company:
Part Number:
AD9847AKSTZ
Manufacturer:
Analog Devices Inc
Quantity:
10 000
Company:
Part Number:
AD9847AKSTZRL
Manufacturer:
Analog Devices Inc
Quantity:
10 000


AD9847
H-Counter Synchronization
The H-Counter reset occurs on the sixth CLI rising edge following
the HD falling edge. The PxGA steering is synchronized with the
reset of the internal H-Counter (see Figure 13).
POWER-UP PROCEDURE
Recommended Power-Up Sequence
When the AD9847 is powered up, the following sequence is
recommended (refer to Figure 14 for each step).
1. Turn on power supplies for AD9847.
2. Apply the master clock input CLI, VD, and HD.
3. The Precision Timing core must be reset by writing a “0” to the
TGCORE_RSTB Register (Address x026) followed by writ-
ing a “l” to the TGCORE_RSTB Register. This will start the
internal timing core operation. Next, initialize the internal
(PIXEL COUNTER)
H-COUNTER
PxGA GAIN
REGISTER
(OUTPUT)
(OUTPUT)
OUTPUTS
WRITES
DIGITAL
SERIAL
(INPUT)
(INPUT)
VDD
CLI
CLI
VD
HD
HD
VD
NOTES
1. INTERNAL H-COUNTER IS RESET ON THE SIXTH CLI RISING EDGE FOLLOWING THE HD FALLING EDGE.
2. PxGA STEERING IS SYNCHRONIZED WITH THE RESET OF THE INTERNAL H-COUNTER (MOSAIC SEPARATE MODE IS SHOWN).
3. VD FALLING EDGE SHOULD OCCUR ONE CLOCK CYCLE BEFORE HD FALLING EDGE FOR PROPER PxGA LINE SYNCHRONIZATION.
X
X
X
X
X
X
3ns MIN
X
X
3ns MIN
t
PWR
X
X
H1/H3, RG
H2/H4
X
X
Figure 14. Recommended Power-Up Sequences
X
X
H-COUNTER
RESET
X
X
Figure 13. H-Counter Synchronization
***
***
0
0
1
1
0
2
1
3
–20–
0
4
5
1
4. Write a “1” to the PREVENTUPDATE Register (Address x019).
5. Write to the desired registers to configure high speed timing
6. Write a “1” to the OUT_CONT Register (Address x016).
7. Write a “0” to the PREVENTUPDATE Register (Address x019).
8. The next VD/HD falling edge allows register updates to occur,
circuitry by first writing “110101” or “53” decimal to the
INITIAL1 Register (Address x020). Finally, write “000100”
or “4” decimal to the INITIAL2 Register (Address x00F).
This will prevent the updating of the serial register data.
and horizontal timing.
This will allow the outputs to become active after the next
VD/HD rising edge.
This will allow the serial information to be updated at the
next VD/HD falling edge.
including OUT_CONT, which enables all clock outputs.
6
0
1
7
8
0
1 H
ODD FIELD
CLOCKS ACTIVE WHEN OUT_CONT REGISTER IS
UPDATED AT VD/HD EDGE
9
1
10
0
11
1
1V
12
0
***
***
14
1
15
0
0
2
EVEN FIELD
1
3
2
2
3
3
4
2
REV. A
5
3
Related parts for AD9847AKST
Image
Part Number
Description
Manufacturer
Datasheet
Request
R

Part Number:
Description:
±1.7g Dual-Axis IMEMS Accelerometer Evaluation Board
Manufacturer:
Analog Devices Inc
Datasheet:

Part Number:
Description:
Inertial Sensor Evaluation System
Manufacturer:
Analog Devices Inc
Datasheet:
Part Number:
Description:
Manufacturer:
Analog Devices Inc
Datasheet:
Part Number:
Description:
Manufacturer:
Analog Devices Inc
Datasheet:
Part Number:
Description:
Manufacturer:
Analog Devices Inc
Datasheet:
Part Number:
Description:
Manufacturer:
Analog Devices Inc
Datasheet:
Part Number:
Description:
Manufacturer:
Analog Devices Inc
Datasheet:
Part Number:
Description:
Manufacturer:
Analog Devices Inc
Datasheet:
Part Number:
Description:
Manufacturer:
Analog Devices Inc
Datasheet:
Part Number:
Description:
Manufacturer:
Analog Devices Inc
Datasheet:
Part Number:
Description:
Manufacturer:
Analog Devices Inc
Datasheet:
Part Number:
Description:
Manufacturer:
Analog Devices Inc
Datasheet:
Part Number:
Description:
Manufacturer:
Analog Devices Inc
Datasheet: