E2E2-X10MB1-M1 Omron, E2E2-X10MB1-M1 Datasheet - Page 16
E2E2-X10MB1-M1
Manufacturer Part Number
E2E2-X10MB1-M1
Description
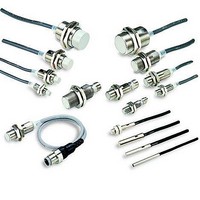
Proximity Sensors With M12 Connector
Manufacturer
Omron
Type
Inductive Proximity Sensorr
Datasheet
1.E2E2-X2Y1-US.pdf
(20 pages)
Specifications of E2E2-X10MB1-M1
Maximum Operating Temperature
+ 70 C
Supply Voltage
24 V
Operating Supply Voltage
10 V to 55 V
Mounting Style
Panel
Sensing Distance
10 mm
Minimum Operating Temperature
- 25 C
Features
NO
Lead Free Status / Rohs Status
Lead free / RoHS Compliant


Loads with Large Inrush Current
Loads, such as lamps or motors, that cause a large inrush
weaken or damage the switching element. In this situation, use a
relay.
* E2K, TL-N@Y: 1 A or higher
●Mounting
Mounting the Sensor
When mounting a Sensor, do not tap it with a hammer or otherwise
subject it to excessive shock. This will weaken water resistance and
may damage the Sensor. If the Sensor is being secured with bolts,
observe the allowable tightening torque. Some models require the
use of toothed washers.
For details, refer to the mounting precautions in Precautions for
Correct Use in individual product information.
Mounting/Removing Using DIN Track
(Example for E2CY)
<Mounting>
(1)Insert the front of the Sensor into the special Mounting Bracket
(2)Press the rear of the Sensor into the special Mounting Bracket or
• When mounting the side of the Sensor using the special Mounting
Bracket, first secure the Amplifier Unit to the special Mounting
Bracket, and then mount the special Mounting Bracket with M3
screws and flat washers with a diameter of 6 mm maximum.
(included) or DIN Track.
DIN Track.
Front
http://www.ia.omron.com/
Flat washers (6 dia. max.)
DIN Track (or Mounting Bracket)
(1)
Rear
(2)
Mounting track (yellow)
current*
will
Proximity Sensors Technical Guide
<Removing>
Set Distance
The sensing distance may vary due to fluctuations in temperature and
voltage. When mounting the Sensor, it is recommend that installation
be based on the set distance.
• While pressing the Amplifier Unit in the direction of (3), lift the fiber
plug in the direction of (4) for easy removal without a screwdriver.
(c)Copyright OMRON Corporation 2008 All Rights Reserved.
(4)
DIN Track
(3)
C-5
Related parts for E2E2-X10MB1-M1
Image
Part Number
Description
Manufacturer
Datasheet
Request
R

Part Number:
Description:
G6S-2GLow Signal Relay
Manufacturer:
Omron Corporation
Datasheet:
Part Number:
Description:
Compact, Low-cost, SSR Switching 5 to 20 A
Manufacturer:
Omron Corporation
Datasheet:
Part Number:
Description:
Manufacturer:
Omron Corporation
Datasheet:
Part Number:
Description:
Manufacturer:
Omron Corporation
Datasheet:
Part Number:
Description:
Manufacturer:
Omron Corporation
Datasheet:
Part Number:
Description:
Manufacturer:
Omron Corporation
Datasheet:
Part Number:
Description:
Manufacturer:
Omron Corporation
Datasheet:
Part Number:
Description:
Manufacturer:
Omron Corporation
Datasheet: