EVAL-PIXIE Flexipanel, EVAL-PIXIE Datasheet - Page 14
EVAL-PIXIE
Manufacturer Part Number
EVAL-PIXIE
Description
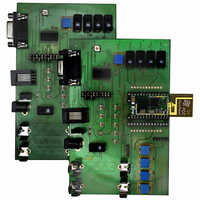
KIT EVALUATION PIXIE
Manufacturer
Flexipanel
Series
Pixie™r
Type
802.15.4/Zigbeer
Specifications of EVAL-PIXIE
Frequency
2.4GHz
Interface Type
RS-232
For Use With/related Products
Pixie ZigBee Modules
Lead Free Status / RoHS Status
Lead free / RoHS Compliant
Other names
658-1012
PIXIE-EVAL
ZEVR3
PIXIE-EVAL
ZEVR3


7.
8.
Reprogramming the Pixies
You will need to reprogram the Pixie as a StarLite
Fast End Device and the Pixie Lite as a StarLite
Sleepy End Device.
To reprogram a Pixie as a StarLite Fast End Device:
9.
10. Remove the jumper pins A1-B1, A2-B2, A3-B3
11. Choose File > Import in the MPLAB menu. Open
12. Choose Programmer > Program to reprogram
13. Turn off the power to the board, replace jumper
14. For RS232 connection, fit jumper A4-B4.
15. Ensure the Config SW is in the Low position and
16. Ensure the EP2 switch is in the Low position.
17. Power up the board.
Page 14
Then press Tx Now. A “<” character will appear
in the Receive window. You have just specified
the MAC address and reverted all other settings
to their defaults.
StarLite USB into broadcast mode. Note that the
last 16 digits are the MAC address. If you intend
to ship UZBees commercially, contact us for an
allocation of unique MAC addresses.
Type the following into the Transmit box::
Ensure you close the Packetizer application now.
On your Windows PC, start up MPLAB and
connect the ICD2 In-Circuit Debugger.
from the board. Connect the RJ11 programming
connector from ICD2 to the RJ11 socket marked
IDC2 on the board. Power up the board.
the
development kit.
StarLite Fast End Device (Pixie).
the Pixie. After a few moments you should get
the message “Programming Succeeded”.
pins A1-B1, A2-B2, A3-B3.
Pixie Config Tool connection (ZEVr4 boards and
higher only), remove the jumper.
HyperTerminal session on the serial port with
settings 9600 baud 8N1, hardware flow control.
ensure it is connected to the pin by fitting jumper
A8-A9. This is the flow control. If it is high, you
may not receive any messages from the board.
This is the sleep input. If it is high, you will not
receive any messages from the board.
programmed it, the status LED should be
#G^9UB33R0015C83841000000
file
25-Jun-07
SLPF.hex
Most importantly, it puts the
This is the firmware for the
Pixie Eval Kit DS482-11
from
If you have just
in
the
Start a
StarLite
For
© FlexiPanel Ltd
18. A
19. Turn off the board now until you are ready to use
20. Repeat steps 10-19 for the Pixie Lite, except
Joining the Network
Since the end user might need to perform the joining
step, we’ve tried to keep it simple. If you have a
spare Pixie or UZBee, you may like to set it up as a
sniffer.
21. The UZBee is the coordinator, so you will be
22. Power up the Pixie evaluation boards with the
23. Power down and up the Pixie board. When it
24. Repeat steps 21-23 for the Pixie Lite evaluation
A “<” character will be received in response. You
have just specified the MAC address and
reverted all other settings to their defaults. Most
importantly, it puts the StarLite into broadcast
mode. Note that the last 16 digits are the MAC
address. If you intend to ship Pixies with StarLite
loaded commercially, contact us for an allocation
of unique MAC addresses.
This specifies a different MAC address.
flashing because it automatically goes into
configuration mode after programming.
LED is not flashing because you haven’t just
performed the previous steps, press and hold the
Bind button for five seconds until the status LED
flashes
HyperTerminal window.
characters in the HyperTerminal window:
it in the next section, Joining then Network.
using the SLLS.hex file (Sleepy end device,
Pixie Lite) and typing the following configuration
string:
joining devices to it. Press the recessed button
on the UZBee. The LED will come on, indicating
it is allowing a new end device to join.
button held down. The status light will come on
while it searches for a new network to join.
When it finds the UZBee coordinator, the LEDs
on both devices will extinguish and they will be
joined.
powers up, note how both LEDs flash to indicate
they have successfully reconnected.
board.
Patents apply and/or pending
#G^9UB9333R0015C83841000001
#G^9UB9333R0015C83841000002
“>”
character
should
Type the following
www.FlexiPanel.com
appear
in
If the
the
Related parts for EVAL-PIXIE
Image
Part Number
Description
Manufacturer
Datasheet
Request
R

Part Number:
Description:
ENERCHIP CC EVAL KIT
Manufacturer:
Cymbet Corporation
Datasheet:

Part Number:
Description:
BOARD EVAL FOR AD976
Manufacturer:
Analog Devices Inc
Datasheet:

Part Number:
Description:
BOARD EVAL FOR ADXL345
Manufacturer:
Analog Devices Inc
Datasheet:

Part Number:
Description:
ENERCHIP CC SEH EVAL KIT
Manufacturer:
Cymbet Corporation
Datasheet:

Part Number:
Description:
ENERCHIP EP ENERGY HARVEST EVAL
Manufacturer:
Cymbet Corporation
Datasheet:

Part Number:
Description:
EVAL BOARD FOR TW6864-LB2-GR
Manufacturer:
Intersil
Datasheet:
Part Number:
Description:
EVAL BOARD FOR TW8816-LB3-GR
Manufacturer:
Intersil
Datasheet:
Part Number:
Description:
EVAL BOARD FOR TW8817-TA3-GRS
Manufacturer:
Intersil
Datasheet:

Part Number:
Description:
EVALUATION MODULE FOR ADUM4160
Manufacturer:
Analog Devices Inc
Datasheet:

Part Number:
Description:
BOARD EVALUATION ADCMP581BCP
Manufacturer:
Analog Devices Inc
Datasheet:
Part Number:
Description:
BOARD EVALUATION ADM1041
Manufacturer:
Analog Devices Inc
Datasheet:

Part Number:
Description:
EVAL BOARD FOR STM32F107VCT
Manufacturer:
STMicroelectronics
Datasheet:
Part Number:
Description:
BOARD EVAL FOR AD1954
Manufacturer:
Analog Devices Inc
Datasheet:
Part Number:
Description:
BOARD EVAL FOR AD1955
Manufacturer:
Analog Devices Inc
Datasheet:

Part Number:
Description:
BOARD EVAL FOR AD7655
Manufacturer:
Analog Devices Inc
Datasheet: