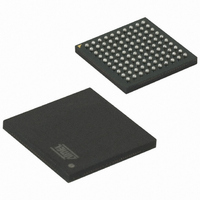
ATMEGA256RZBV-8CU Atmel, ATMEGA256RZBV-8CU Datasheet - Page 8

ATMEGA256RZBV-8CU
Manufacturer Part Number
ATMEGA256RZBV-8CU
Description
BUNDLE ATMEGA2560V/AT86RF230-ZU
Manufacturer
Atmel
Series
ATMEGAr
Datasheet
1.ATMEGA64RZAPV-10MU.pdf
(21 pages)
Specifications of ATMEGA256RZBV-8CU
Frequency
2.4GHz
Modulation Or Protocol
802.15.4 Zigbee
Applications
ISM, ZigBee™
Power - Output
3dBm
Sensitivity
-101dBm
Voltage - Supply
1.8 V ~ 3.6 V
Current - Receiving
15.5mA
Current - Transmitting
16.5mA
Data Interface
PCB, Surface Mount
Memory Size
256kB Flash, 4kB EEPROM, 8kB RAM
Antenna Connector
PCB, Surface Mount
Package / Case
100-TFBGA
Wireless Frequency
2.4 GHz
Interface Type
SPI, USART
Output Power
3 dBm
For Use With
ATAVRISP2 - PROGRAMMER AVR IN SYSTEMATJTAGICE2 - AVR ON-CHIP D-BUG SYSTEM
Lead Free Status / RoHS Status
Lead free / RoHS Compliant
Operating Temperature
-
Data Rate - Maximum
-
Lead Free Status / Rohs Status
Lead free / RoHS Compliant
For Use With/related Products
ATmega256
8
AVR414
Figure 4-1 Jumper Placement on the STK500
Step B. Assemble and attach the STK501 Top Module
The jumpers are now set correctly and the target voltage is set to 3 volts. This
ensures that the AT86RF230 radio transceiver is not damaged and the ATmega1281
will run at 8MHz. The next steps describe how to mount the STK501 top module.
1. Insert an ATmega1281 into the Zero Insertion Force (ZIF) socket on the STK501.
2. Ensure that power is turned off on the STK500 board.
3. Connect the STK501 to the STK500 by using expansion header 0 and 1. Ensure
4. Connect PINE1 and PINE2 to the RXD and TXD pins respectively. This can be
5. To enable the In-System Programmer (ISP) interface, connect a 6-wire cable
Press the spring-loaded top frame of the ZIF down and gently aligning the device
underneath the fine-pitched wires. Verify that pin 1 on the TQFP package (dot in
one of its corners) points towards the notched corner of the ZIF.
that the EXPAND0 written on the STK501 top module aligns with the EXPAND0
written beside the expansion header on the STK500 board.
done using one of the 2-wire cables included in the STK500 starter kit. The RXD
and TXD pins are found close to the 9-pins RS-232 connector on the STK501.
between the ISP6PIN connector on the STK500 board and the SPROG connector
on the STK501 top module as shown in Figure 4-2.
8051A-AVR-11/06


