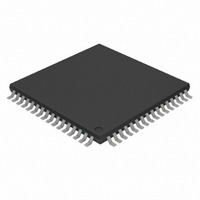
PIC17LC756A-08I/PT Microchip Technology, PIC17LC756A-08I/PT Datasheet - Page 181

PIC17LC756A-08I/PT
Manufacturer Part Number
PIC17LC756A-08I/PT
Description
IC MCU OTP 16KX16 A/D 64TQFP
Manufacturer
Microchip Technology
Series
PIC® 17Cr
Specifications of PIC17LC756A-08I/PT
Core Size
8-Bit
Program Memory Size
32KB (16K x 16)
Oscillator Type
External
Core Processor
PIC
Speed
8MHz
Connectivity
I²C, SPI, UART/USART
Peripherals
Brown-out Detect/Reset, POR, PWM, WDT
Number Of I /o
50
Program Memory Type
OTP
Ram Size
902 x 8
Voltage - Supply (vcc/vdd)
3 V ~ 5.5 V
Data Converters
A/D 12x10b
Operating Temperature
-40°C ~ 85°C
Package / Case
64-TFQFP
Controller Family/series
PIC17
No. Of I/o's
50
Ram Memory Size
902Byte
Cpu Speed
33MHz
No. Of Timers
4
No. Of Pwm
RoHS Compliant
Processor Series
PIC17LC
Core
PIC
Data Bus Width
8 bit
Data Ram Size
902 B
Interface Type
I2C, MSSP, RS- 232, SCI, SPI, USART
Maximum Clock Frequency
8 MHz
Number Of Programmable I/os
50
Number Of Timers
8
Operating Supply Voltage
3 V to 5.5 V
Maximum Operating Temperature
+ 85 C
Mounting Style
SMD/SMT
Minimum Operating Temperature
- 40 C
On-chip Adc
12 bit
Lead Free Status / RoHS Status
Lead free / RoHS Compliant
Eeprom Size
-
Lead Free Status / Rohs Status
Details
Other names
PIC17LC756A-08IPT
Available stocks
Company
Part Number
Manufacturer
Quantity
Price
Company:
Part Number:
PIC17LC756A-08I/PT
Manufacturer:
MICROCHIP
Quantity:
12 000
Company:
Part Number:
PIC17LC756A-08I/PT
Manufacturer:
Microchip Technology
Quantity:
10 000
- Current page: 181 of 304
- Download datasheet (6Mb)
The ADRESH:ADRESL registers contain the 10-bit
result of the A/D conversion. When the A/D conversion
is complete, the result is loaded into this A/D result reg-
ister pair, the GO/DONE bit (ADCON0<2>) is cleared
and A/D interrupt flag bit, ADIF is set. The block
diagrams of the A/D module are shown in Figure 16-1.
After the A/D module has been configured as desired,
the selected channel must be acquired before the con-
version is started. The analog input channels must
have their corresponding DDR bits selected as inputs.
To determine sample time, see Section 16.1. After this
acquisition time has elapsed, the A/D conversion can
be started. The following steps should be followed for
doing an A/D conversion:
1.
FIGURE 16-1:
2000 Microchip Technology Inc.
Configure the A/D module:
a)
b)
c)
d)
Configure analog pins/voltage reference/
and digital I/O (ADCON1)
Select A/D input channel (ADCON0)
Select A/D conversion clock (ADCON0)
Turn on A/D module (ADCON0)
Note 1: These channels are only available on PIC16C76X devices.
Converter
A/D
(Reference
Voltage)
A/D BLOCK DIAGRAM
V
V
REF
REF
+
-
(Input Voltage)
V
IN
PCFG0
AV
DD
2.
3.
4.
5.
6.
7.
AV
Configure A/D interrupt (if desired):
a)
b)
c)
Wait the required acquisition time.
Start conversion:
a)
Wait for A/D conversion to complete, by either:
a)
OR
b)
Read
(ADRESH:ADRESL), clear bit ADIF, if required.
For next conversion, go to step 1 or step 2, as
required. The A/D conversion time per bit is
defined as T
required before next acquisition starts.
SS
Clear ADIF bit
Set ADIE bit
Clear GLINTD bit
Set GO/DONE bit (ADCON0)
Polling for the GO/DONE bit to be cleared
Waiting for the A/D interrupt
CHS3:CHS0
A/D
AD
1010
1001
1000
0001
0000
1011
1011
1011
1011
1011
0111
0110
0101
0100
0011
0010
. A minimum wait of 2T
Result
PIC17C7XX
DS30289B-page 181
register
AN1/V
AN0/V
AN15
AN14
AN13
AN12
AN11
AN10
AN9
AN8
AN7
AN6
AN5
AN4
AN3
AN2
(1)
(1)
(1)
(1)
REF
REF
AD
-
+
pair
is
Related parts for PIC17LC756A-08I/PT
Image
Part Number
Description
Manufacturer
Datasheet
Request
R

Part Number:
Description:
IC MCU OTP 16KX16 A/D 68PLCC
Manufacturer:
Microchip Technology
Datasheet:

Part Number:
Description:
IC MCU OTP 16KX16 A/D 64TQFP
Manufacturer:
Microchip Technology
Datasheet:

Part Number:
Description:
IC MCU OTP 16KX16 A/D 68PLCC
Manufacturer:
Microchip Technology
Datasheet:

Part Number:
Description:
MICRO CTRL 16K LOW PWR 68PLCC
Manufacturer:
Microchip Technology
Datasheet:

Part Number:
Description:
MICRO CTRL 16K LOW PWR 64SDIP
Manufacturer:
Microchip Technology
Datasheet:

Part Number:
Description:
MICRO CTRL 16K LOW PWR 64SDIP
Manufacturer:
Microchip Technology
Datasheet:

Part Number:
Description:
MICRO CTRL 16K LOW PWR 68PLCC
Manufacturer:
Microchip Technology
Datasheet:

Part Number:
Description:
Manufacturer:
Microchip Technology Inc.
Datasheet:

Part Number:
Description:
Manufacturer:
Microchip Technology Inc.
Datasheet:

Part Number:
Description:
Manufacturer:
Microchip Technology Inc.
Datasheet:

Part Number:
Description:
Manufacturer:
Microchip Technology Inc.
Datasheet:

Part Number:
Description:
Manufacturer:
Microchip Technology Inc.
Datasheet:


