AD5170BRM50-RL7 Analog Devices Inc, AD5170BRM50-RL7 Datasheet - Page 18
AD5170BRM50-RL7
Manufacturer Part Number
AD5170BRM50-RL7
Description
IC DGTL POT 50K 256POS 10MSOP TR
Manufacturer
Analog Devices Inc
Datasheet
1.AD5170BRMZ50.pdf
(24 pages)
Specifications of AD5170BRM50-RL7
Rohs Status
RoHS non-compliant
Taps
256
Resistance (ohms)
50K
Number Of Circuits
1
Temperature Coefficient
35 ppm/°C Typical
Memory Type
Non-Volatile
Interface
I²C, 2-Wire Serial
Voltage - Supply
2.7 V ~ 5.5 V
Operating Temperature
-40°C ~ 125°C
Mounting Type
Surface Mount
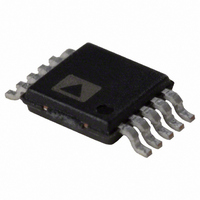
Package / Case
10-MSOP, Micro10™, 10-uMAX, 10-uSOP
Resistance In Ohms
50K


AD5170
CONTROLLING THE AD5170
There are two ways of controlling the AD5170. Users can program the device with either computer software or external I
SOFTWARE PROGRAMMING
Due to the advantages of the one-time programmable feature,
consider programming the device in the factory before shipping
the final product to the end users. Analog Devices offers device
programming software that can be implemented in the factory
on PCs running Windows 95 or later. As a result, external con-
trollers are not required, significantly reducing development time.
The program is an executable file that does not require knowledge
of programming languages or programming skills, and it is easy to
set up and to use. Figure 42 shows the software interface. The
software can be downloaded from the
Write
The AD5170 starts at midscale after power-up prior to OTP
programming. To increment or decrement the resistance, move
the scroll bars on the left. To write any specific value, use the bit
pattern in the upper screen and click Run . The format of writing
data to the device is shown in Table 9. Once the desired setting
is found, click Program Permanent: First Fuse Link to blow
the internal fuse links.
Read
To read the validation bits and data from the device, click Read .
The format of the read bits is shown in Table 10.
DEVICE PROGRAMMING
To apply the device programming software in the factory, modify
a parallel port cable and configure Pin 2, Pin 3, Pin 15, and Pin 25
for SDA_write, SCL, SDA_read, and DGND, respectively, for
the control signals (see Figure 43). Also, lay out the PCB of the
AD5170 with SCL and SDA pads, as shown in Figure 44, such
that pogo pins can be inserted for factory programming.
AD5170
product page.
Figure 42. AD5170 Computer Software Interface
Rev. F | Page 18 of 24
(Pin 2 = SDA_write, Pin 3 = SCL, Pin 15 = SDA_read, and Pin 25 = DGND)
Figure 44. Recommended AD5170 PCB Layout
Figure 43. Parallel Port Connection
GND
VDD
AD0
B
A
13
25
12
24
11
23
10
22
9
21
8
20
7
19
6
18
5
17
4
16
3
15
2
14
1
AD5170
100Ω
100Ω
100Ω
R3
R2
R1
WRITE
READ
W
NC
AD1
SDA
SCL
SCL
SDA
2
C controllers.
Related parts for AD5170BRM50-RL7
Image
Part Number
Description
Manufacturer
Datasheet
Request
R

Part Number:
Description:
256-Position Two-Time Programmable I2C Digital Potentiometer
Manufacturer:
Analog Devices
Datasheet:

Part Number:
Description:
±1.7g Dual-Axis IMEMS Accelerometer Evaluation Board
Manufacturer:
Analog Devices Inc
Datasheet:

Part Number:
Description:
Inertial Sensor Evaluation System
Manufacturer:
Analog Devices Inc
Datasheet:
Part Number:
Description:
Manufacturer:
Analog Devices Inc
Datasheet:
Part Number:
Description:
Manufacturer:
Analog Devices Inc
Datasheet:
Part Number:
Description:
Manufacturer:
Analog Devices Inc
Datasheet:
Part Number:
Description:
Manufacturer:
Analog Devices Inc
Datasheet:
Part Number:
Description:
Manufacturer:
Analog Devices Inc
Datasheet:
Part Number:
Description:
Manufacturer:
Analog Devices Inc
Datasheet:
Part Number:
Description:
Manufacturer:
Analog Devices Inc
Datasheet:
Part Number:
Description:
Manufacturer:
Analog Devices Inc
Datasheet:
Part Number:
Description:
Manufacturer:
Analog Devices Inc
Datasheet:
Part Number:
Description:
Manufacturer:
Analog Devices Inc
Datasheet: