20-101-1221 Rabbit Semiconductor, 20-101-1221 Datasheet - Page 65
20-101-1221
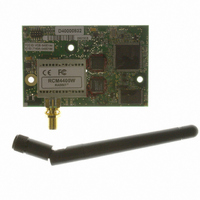
Manufacturer Part Number
20-101-1221
Description
RCM4400W (JAPAN TELEC CERTIFIED)
Manufacturer
Rabbit Semiconductor
Series
RabbitCore®r
Datasheet
1.20-101-1202.pdf
(126 pages)
Specifications of 20-101-1221
Frequency
2.4GHz
Modulation Or Protocol
802.11 b
Power - Output
16dBm
Voltage - Supply
3.3V
Current - Receiving
450mA
Current - Transmitting
450mA
Data Interface
Connector, 2 x 25 Header
Memory Size
512K Flash, 1MB SRAM
Antenna Connector
SMA
Operating Temperature
-20°C ~ 85°C
Package / Case
Module
Lead Free Status / RoHS Status
Lead free / RoHS Compliant
Applications
-
Sensitivity
-
Data Rate - Maximum
-
Other names
316-1147


6.2.3.2 PC/Laptop/PDA Configuration
This section shows how to configure your PC or notebook to run the sample programs.
Here we’re mainly interested in the PC or notebook that will be communicating wirelessly,
which is not necessarily the PC that is being used to compile and run the sample program
on the RCM4400W module.
When you are using an access point with your setup in the infrastructure mode, you will also
have to set the IP address and netmask (e.g., 10.10.6.99 and 255.255.255.0) for the access
point. Check the documentation for the access point for information on how to do this.
Infrastructure Mode (via Ethernet connection)
User’s Manual
This section provides configuration
information for the three possible Wi-Fi
setups shown in Figure 11. Start by going
to the control panel (
Control Panel
Connections
here are from Windows 2000, and the
interface is similar for other versions of
Windows.
Check with your administrator if you are
unable to change the settings as
described here since you may need
administrator privileges.
1. Go to the
select the network interface card used you
intend to use (e.g.,
Card Network Adapter
“Properties” button. Depending on which
version of Windows your PC is running,
you may have to select the “Local Area
Connection” first, and then click on the
“Properties” button to bring up the Ether-
net interface dialog. Then “configure”
your interface card for an “Auto-Negotia-
tion” or “10Base-T Half-Duplex” connec-
tion on the “Advanced” tab.
NOTE: Your network interface card will
likely have a different name.
Local Area Connection
. The screen shots shown
) and click on
Start > Settings >
TCP/IP Xircom Credit
) and click on the
Network
to
59
Related parts for 20-101-1221
Image
Part Number
Description
Manufacturer
Datasheet
Request
R

Part Number:
Description:
COMPUTER SGL-BRD BL2500 29.4MHZ
Manufacturer:
Rabbit Semiconductor
Datasheet:

Part Number:
Description:
COMPUTER SGL-BRD BL2500 29.4MHZ
Manufacturer:
Rabbit Semiconductor
Datasheet:

Part Number:
Description:
DISPLAY GRAPHIC 12KEY PROG OP670
Manufacturer:
Rabbit Semiconductor
Datasheet:
Part Number:
Description:
DISPLAY GRAPHIC 12KEY ETH OP6700
Manufacturer:
Rabbit Semiconductor
Datasheet:

Part Number:
Description:
COMPUTER SINGLE-BOARD BL2030
Manufacturer:
Rabbit Semiconductor
Part Number:
Description:
COMPUTER SGL-BOARD ETH BL2010
Manufacturer:
Rabbit Semiconductor

Part Number:
Description:
MODULE OP6810 W/O ETH/MEM EXPANS
Manufacturer:
Rabbit Semiconductor
Datasheet:
Part Number:
Description:
COMPUTER SINGLE-BOARD BL2020
Manufacturer:
Rabbit Semiconductor
Part Number:
Description:
COMPUTER BL2010 W/FRICTION LOCK
Manufacturer:
Rabbit Semiconductor
Part Number:
Description:
COMPUTER BL2020 W/FRICTION LOCK
Manufacturer:
Rabbit Semiconductor
Part Number:
Description:
COMPUTER SGL-BRD BL2500 44.2MHZ
Manufacturer:
Rabbit Semiconductor
Datasheet:
Part Number:
Description:
COMPUTER SGL-BOARD FULL BL2000
Manufacturer:
Rabbit Semiconductor

Part Number:
Description:
COMPUTER SINGLE-BOARD BL2110
Manufacturer:
Rabbit Semiconductor

Part Number:
Description:
COMPUTER SGL-BRD 29.4MHZ BL2610
Manufacturer:
Rabbit Semiconductor
Datasheet:
Part Number:
Description:
INTERFACE OP6800 512K FLASH&SRAM
Manufacturer:
Rabbit Semiconductor
Datasheet: