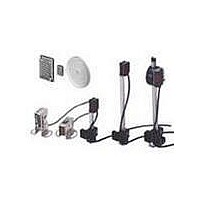
E39-C1 Omron, E39-C1 Datasheet - Page 18

E39-C1
Manufacturer Part Number
E39-C1
Description
E3MC CABLE CONNECTOR 2M
Manufacturer
Omron
Type
Threaded Cylindrical Photoelectric Sensorsr
Specifications of E39-C1
Features
Axial and Radial types
Sensing Distance
7 mm
Amplifier Type
Built In Amplifier
Lead Free Status / RoHS Status
Lead free / RoHS Compliant
Lead Free Status / RoHS Status
Lead free / RoHS Compliant
E3MC
Precautions
General
Do not impose any voltage exceeding the rated voltage on the
E3MC, otherwise the E3MC may be damaged.
When supplying power to the E3MC, make sure that the polarity
of the power is correct, otherwise the E3MC may be damaged.
Do not short-circuit the load connected to the E3MC, otherwise
the E3MC may be damaged.
Optical Fiber Type
Tightening Torque
The Fiber Unit must be tightened to a maximum torque of
0.54 N·m.
Mounting
When Fiber Units are mounted to face each other, make sure to
adjust the optical axes so that the Fiber Units will not be mutually
interfered.
Handling the Fiber Unit
Do not pull or press the Fiber Unit.
Do not bend the Fiber Unit beyond 10 mm.
Do not bend the edge of the Fiber Unit.
Do not apply excess force on the Fiber Unit.
The Fiber Head could be broken by excessive vibration. To pre-
vent this, the following is effective:
General-purpose Optical Fiber Type
Insertion
The inserted Fiber Unit comes in contact with the internal rubber
packing first. Insert the Fiber Unit further until it comes in contact
with the innermost end.
18
Correct
Sensor head
Incorrect
Correct
Incorrect
Sensor head
20 mm min.
Tape
20 mm min.
Fiber Unit
Nylon wire holder
A one-turn loop can
absorb vibrations.
Amplifier Unit
Amplifier Unit
Mounting
Tighten the Fiber Unit with a screwdriver to a torque of 0.2 N·m.
Fibers
Among the recommended fibers, the E32-CC200 and E32-D32L
have white or dotted yellow lines on the fiber to be inserted into
the emitter. When using the E3MC-(M)Y@@, insert the fiber with
the line into the emitter section at the bottom of the amp.
Fiber Unit
Tightening Torque
When mounting the Fiber Unit, refer to the following table and
make sure that the tightening torque applied is correct.
M3 screw
M4 screw
M6 screw
2-dia. column
3-dia. column
E32-T16
Make sure that the size of the wrench applied to the nut is correct.
Fiber Cutting
Insert the fiber into one of the insertion holes of the Cutting Tool
to cut the fiber to the desired length.
Press down the blade of the Cutting Tool to cut the fiber in a sin-
gle stroke. Do not stop the Cutting Tool midway.
Each insertion hole can be used only once. Do not use it again,
otherwise the fiber may not be cut properly and the sensing dis-
tance may decrease.
Fiber Unit
Screw-mounting Type
Column Type
Lock nuts (provided
with the E3MC)
0.78 N·m max.
0.98 N·m max.
0.29 N·m max.
0.29 N·m max.
0.49 N·m max.
Flat or pan head set screw (M3 max.)
Tightening torque
Mounting bracket
Toothed washer
View hole
E3MC


