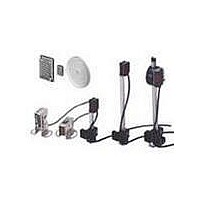
E39-C1 Omron, E39-C1 Datasheet - Page 19

E39-C1
Manufacturer Part Number
E39-C1
Description
E3MC CABLE CONNECTOR 2M
Manufacturer
Omron
Type
Threaded Cylindrical Photoelectric Sensorsr
Specifications of E39-C1
Features
Axial and Radial types
Sensing Distance
7 mm
Amplifier Type
Built In Amplifier
Lead Free Status / RoHS Status
Lead free / RoHS Compliant
Lead Free Status / RoHS Status
Lead free / RoHS Compliant
E3MC
Connection
Do not pull the Fiber Unit with force exceeding 9.8 N or press the
Fiber Unit with force exceeding 29.4 N.
The fiber is so thin that the utmost attention will be required to
handle the fiber.
Do not bend the Fiber Unit beyond the permissible bending radius
provided in Ratings/Characteristics.
Do not bend the end of the Fiber Unit.
Do not press or place a load on the Fiber Unit.
The Fiber Head can be broken by excessive vibration. To prevent
this, the following is effective.
Built-in Amplifier Type
Tightening Torque
The Amplifier Unit must be tightened to a maximum torque of
2.3 N·m.
Mounting
When Sensors are mounted to face each other, make sure to
adjust the optical axes so that the Sensors will not be mutually
interfered.
Correct
Incorrect
Fiber Unit
Tape
Fiber Unit
20 mm min.
20 mm min.
A one-turn loop can absorb vibrations.
Fiber Unit
Nylon wire holder
Amplifier
Amplifier
Installation
Power Reset Time
The E3MC is ready to sense objects from 100 ms after the E3MC
is turned ON, until when no devices connected the E3MC can be
used. Be sure to turn ON the E3MC first if power is supplied to the
E3MC and the load independently.
When the E3MC is turned ON or OFF, the operation indicator will
be ON for an instant but no control output will be turned ON.
When using the Sensor for fine sensing, allow the system to
warm up for approximately 15 min after turning ON the power
supply.
Power OFF
The E3MC may output a single pulse when the control power sup-
ply is turned OFF. If the E3MC is connected to a timer or counter
to which power is supplied from an independent power supply, the
E3MC will be more likely to output a single pulse when the control
power supply is turned OFF. Therefore, supply power to the timer
or counter from the same power supply for the E3MC.
Types of Power Supplies
No full-wave or half-wave rectified power supplies can be con-
nected to the E3MC.
Power Supplies
Be sure to ground the FG (frame ground) and G (ground) termi-
nals if a switching regulator is connected to the E3MC, otherwise
the E3MC may malfunction due to the switching noise of the
switching regulator.
Wiring
Cord
The cord can be extended up to 100 m provided that the thick-
ness of the cord is 0.3 mm
Repeated Bending
The cord must not be bent repeatedly.
High-tension Lines
The power supply lines of the Photoelectric Sensor must not be
wired alongside power lines or high-tension lines in the same con-
duit, otherwise the Photoelectric Sensor may become damaged
or malfunction due to induction noise that may be generated from
the power lines or high-tension lines. Route the lines separately
or in a single conduit.
Cord Pulling Force
Do not pull cords with pulling forces exceeding 50 N.
Others
EEPROM Error
An EEPROM error may result if power supply to the Sensor fails
or the Sensor is influenced by static noise. The operation and
bank indicators will flash and the buzzer will beep if there is an
EEPROM error, in which case perform teaching and make thresh-
old level settings again.
M12 Metal Connector
Make sure to connect or disconnect the metal connector after
turning off the E3MC.
Make sure to hold the connector cover when connecting or dis-
connecting the metal connector.
Tighten the metal connector securely by hand. Do not use any
tool, such as pliers, otherwise the metal connector may be dam-
aged.
If the metal connector is not tightened securely, the metal connec-
tor may be disconnected by vibration or the proper degree of pro-
tection of the E3MC may not be maintained.
Water Precaution
Avoid using the Sensor in water, rain, or outdoors.
Protective Cover
Tighten the operation cover to a torque of 0.2 to 0.3 N·m to
ensure proper waterproofing.
2
maximum.
E3MC
19


