CY7C63743-PXC Cypress Semiconductor Corp, CY7C63743-PXC Datasheet - Page 11
CY7C63743-PXC
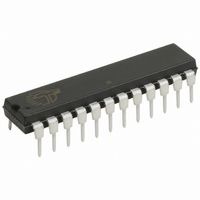
Manufacturer Part Number
CY7C63743-PXC
Description
IC MCU 8K USB/PS2 LS 24DIP
Manufacturer
Cypress Semiconductor Corp
Series
enCoRe™r
Specifications of CY7C63743-PXC
Applications
USB Microcontroller
Core Processor
M8B
Program Memory Type
OTP (8 kB)
Controller Series
CY7C637xx
Ram Size
256 x 8
Interface
PS2, USB
Number Of I /o
16
Voltage - Supply
4 V ~ 5.5 V
Operating Temperature
0°C ~ 70°C
Mounting Type
Through Hole
Package / Case
24-DIP (0.300", 7.62mm)
Lead Free Status / RoHS Status
Lead free / RoHS Compliant
Other names
428-1621
Available stocks
Company
Part Number
Manufacturer
Quantity
Price
Company:

Part Number:
CY7C63743-PXC
Manufacturer:
TI
Quantity:
12 749


Bit 3: Low-voltage Reset Disable
Bit 2: Precision USB Clocking Enable
Bit 1: Internal Clock Output Disable
Bit 0: External Oscillator Enable
Internal/External Oscillator Operation
The internal oscillator provides an operating clock, factory set to
a nominal frequency of 6 MHz. This clock requires no external
components. At power-up, the chip operates from the internal
clock. In this mode, the internal clock is buffered and driven to
the XTALOUT pin by default, and the state of the XTALIN pin can
be read at Port 2.1. While the internal clock is enabled, its output
can be disabled at the XTALOUT pin by setting the Internal Clock
Output Disable bit of the Clock Configuration Register.
Setting the External Oscillator Enable bit of the Clock Configu-
ration Register HIGH disables the internal clock, and halts the
part while the external resonator/crystal oscillator is started. The
Document #: 38-08022 Rev. *D
When V
V
controller enters a partial suspend state for a period of t
(see Section for the value of t
gins from address 0x0000 after this t
provides time for V
code. See Section for more details.
1 = Disables the LVR circuit.
0 = Enables the LVR circuit.
The Precision USB Clocking Enable only affects operation in
internal oscillator mode. In that mode, this bit must be set
to 1 to cause the internal clock to automatically precisely
tune to USB timing requirements (6 MHz ±1.5%). The fre-
quency may have a looser initial tolerance at power-up, but
all USB transmissions from the chip will meet the USB spec-
ification.
1 = Enabled. The internal clock accuracy is 6 MHz ±1.5% after
USB traffic is received.
0 = Disabled. The internal clock accuracy is 6 MHz ±5%.
The Internal Clock Output Disable is used to keep the internal
clock from driving out to the XTALOUT pin. This bit has no
effect in the external oscillator mode.
1 = Disable internal clock output. XTALOUT pin will drive
HIGH.
0 = Enable the internal clock output. The internal clock is driv-
en out to the XTALOUT pin.
At power-up, the chip operates from the internal clock by de-
fault. Setting the External Oscillator Enable bit HIGH disables
the internal clock, and halts the part while the external reso-
nator/crystal oscillator is started. Clearing this bit has no im-
mediate effect, although the state of this bit is used when
waking out of suspend mode to select between internal and
external clock. In internal clock mode, XTALIN pin will be con-
figured as an input with a weak pull-down and can be used as
a GPIO input (P2.1).
1 = Enable the external oscillator. The clock is switched to
external clock mode, as described in Section .
0 = Enable the internal oscillator.
LVR
) and the Low-voltage Reset circuit is enabled, the micro-
CC
drops below V
CC
to stabilize before the part executes
LVR
START
(see Section for the value of
). Program execution be-
START
delay period. This
START
steps involved in switching from Internal to External Clock mode
are as follows:
If the Internal Clock is enabled, the XTALIN pin can serve as a
general purpose input, and its state can be read at Port 2, Bit 1
(P2.1). Refer to Figure for the Port 2 Data Register. In this mode,
there is a weak pull-down at the XTALIN pin. This input cannot
provide an interrupt source to the CPU.
External Oscillator
The user can connect a low-cost ceramic resonator or an
external oscillator to the XTALIN/XTALOUT pins to provide a
precise reference frequency for the chip clock, as shown in
Figure . The external components required are a ceramic
resonator or crystal and any associated capacitors. To run from
the external resonator, the External Oscillator Enable bit of the
Clock Configuration Register must be set to 1, as explained in
the previous section.
Start-up times for the external oscillator depend on the
resonating device. Ceramic resonator based oscillators typically
start in less than 100 μs, while crystal based oscillators take
longer, typically 1 to 10 ms. Board capacitance should be
minimized on the XTALIN and XTALOUT pins by keeping the
traces as short as possible.
An external 6-MHz clock can be applied to the XTALIN pin if the
XTALOUT pin is left open.
Reset
The USB Controller supports three types of resets. The effects
of the reset are listed below. The reset types are:
The occurrence of a reset is recorded in the Processor Status
and Control Register (Figure 33). Bits 4 (Low-voltage or
1. At reset, chip begins operation using the internal clock.
2. Firmware sets Bit 0 of the Clock Configuration Register. For
3. Internal clocking is halted, the internal oscillator is disabled,
4. After the external clock becomes stable, chip clocks are
5. After an additional delay the CPU is released to run. This
6. Once the chip has been set to external oscillator, it can only
1. Low-voltage Reset (LVR)
2. Brown Out Reset (BOR)
3. Watchdog Reset (WDR)
example,
and the external clock oscillator is enabled.
re-enabled using the external clock signal. (Note that the time
for the external clock to become stable depends on the
external resonating device; see next section.)
delay depends on the state of the Ext. Clock Resume Delay
bit of the Clock Configuration Register. The time is 128 μs if
the bit is 0, or 4 ms if the bit is 1.
return to internal clock when waking from suspend mode.
Clearing bit 0 of the Clock Configuration Register will not
re-enable internal clock mode until suspend mode is entered.
See Section for more details on suspend mode operation.
mov A, 1h
iowr F8h
; Set Bit 0 HIGH (External Oscillator
; Write to Clock Configuration
Enable bit). Bit 7 cleared gives
faster start-up
Register
CY7C63722C
CY7C63723C
CY7C63743C
Page 11 of 53
[+] Feedback
Related parts for CY7C63743-PXC
Image
Part Number
Description
Manufacturer
Datasheet
Request
R

Part Number:
Description:
Manufacturer:
Cypress Semiconductor Corp
Datasheet:
Part Number:
Description:
Manufacturer:
Cypress Semiconductor Corp
Datasheet:
Part Number:
Description:
Manufacturer:
Cypress Semiconductor Corp
Datasheet:
Part Number:
Description:
Manufacturer:
Cypress Semiconductor Corp
Datasheet:
Part Number:
Description:
Manufacturer:
Cypress Semiconductor Corp
Datasheet: