CY8CKIT-001 Cypress Semiconductor Corp, CY8CKIT-001 Datasheet - Page 91
CY8CKIT-001
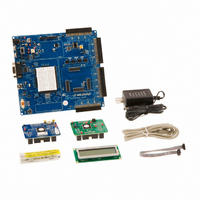
Manufacturer Part Number
CY8CKIT-001
Description
KIT DEV FOR PSOC3/5
Manufacturer
Cypress Semiconductor Corp
Series
PSoC® CapSenser
Type
MCUr
Datasheets
1.CY8CKIT-001.pdf
(2 pages)
2.CY8CKIT-001.pdf
(5 pages)
3.CY8CKIT-001.pdf
(116 pages)
4.CY8CKIT-001.pdf
(12 pages)
Specifications of CY8CKIT-001
Contents
Board, CD, CY8C29 & CY8C38 Modules, MiniProg3 Programmer/Debugger, Power Supply
Processor To Be Evaluated
CY8C29, CY8C38
Interface Type
RS-232, USB, JTAG
Operating Supply Voltage
3.3 V, 5 V
Lead Free Status / RoHS Status
Lead free / RoHS Compliant
For Use With/related Products
PSoC 1, PSoC 3 and PSoC 5
Lead Free Status / Rohs Status
Lead free / RoHS Compliant
Other names
428-2961
Available stocks
Company
Part Number
Manufacturer
Quantity
Price
Company:

Part Number:
CY8CKIT-001A
Manufacturer:
Cypress Semiconductor
Quantity:
135


3.2.4.7
CY8CKIT-001 PSoC Development Kit Guide, Doc. # 001-48651 Rev. **
*/
}
/*******************************************************************************
* Function Name: GetAckLoadEp
********************************************************************************
*
* Summary:
*
*
*
* Parameters:
*
*
* Return:
*
*
*******************************************************************************/
static void GetAckLoadEp(uint8 * keyboardData)
{
/* Wait for ACK before loading data */
}
/* [] END OF FILE */
3. From the Build menu, select Build Ex4_USB_HID. PSoC Creator builds the project and displays
Configuring and Programming the PSoC Development Board
Note The PSoC Development Board is able to draw up to 1 amp of current. As a result, be careful
when powering the development board from the USB 'VBUS' power rail. Connect the development
board to the host PC's root hub rather than an external hub. To reduce the chances of disrupting
other USB peripherals make certain that the hub is self powered.
1. Disconnect the power to the board.
2. Configure the DVK bread board SW3 to 3.3V.
3. Configure the DVK bread board using the jumper wires.
4. Connect the USB cable to the PC and to the USB port (J9)
5. Reapply power to the board.
6. Use PSoC Creator as described in section
7. After programing the device, press Reset.
8. When button SW1 is pressed, the Windows Run window opens and the keyboard key sequence
9. Save and close the project.
the comments in the Output dialog box. When you see the message “Build Succeeded” the build
is complete.
❐
❐
device.
for the Cypress website is sent to open the Cypress website.
keyboardData[MODIFIER_KEY_DATA_INDEX] = KEY_RELEASE; /* Windows modifier break
GetAckLoadEp(keyboardData); /* Send USB keyboard data */
It first confirms that an Acknowledge transaction occurred on the keyboard
endpoint. Once the ACK is confirmed the endpoint and enabled and loaded.
keyboardData: Data array for the keyboard device endpoint
void
while(!USBFS_bGetEPAckState(KEYBOARD_ENDPOINT));
/* ACK has occurred, load the endpoint */
USBFS_LoadInEP(KEYBOARD_ENDPOINT, keyboardData, KEYBOARD_DATA_SIZE);
P1[5] to SW1
P1[6] to LED1
CyDelay (500); /* Delay about 0.5 seconds to allow Run window to pop-up */
Programming a Device on page 15
to program the
Sample Projects
87
[+] Feedback
Related parts for CY8CKIT-001
Image
Part Number
Description
Manufacturer
Datasheet
Request
R

Part Number:
Description:
KIT DEV FOR PSOC3/5
Manufacturer:
Cypress Semiconductor Corp
Datasheet:

Part Number:
Description:
PSoC1/3/5 Development Kit
Manufacturer:
Cypress Semiconductor Corp
Datasheet:

Part Number:
Description:
KIT DEV PSOC PROC MODULE CY8C38
Manufacturer:
Cypress Semiconductor Corp

Part Number:
Description:
KIT DEV PSOC PROC MODULE CY8C29
Manufacturer:
Cypress Semiconductor Corp

Part Number:
Description:
KIT DEV PSOC ANALOG VOLTMETER
Manufacturer:
Cypress Semiconductor Corp
Datasheet:

Part Number:
Description:
KIT DEV PSOC5 FIRST TOUCH
Manufacturer:
Cypress Semiconductor Corp
Datasheet:

Part Number:
Description:
KIT DEV PSOC3 FIRSTTOUCH STARTER
Manufacturer:
Cypress Semiconductor Corp
Datasheet:
Part Number:
Description:
KIT DEV PROC MODULE PSOC5
Manufacturer:
Cypress Semiconductor Corp
Datasheet:

Part Number:
Description:
KIT PSOC CY8C28 FAMILY PROCESSOR
Manufacturer:
Cypress Semiconductor Corp
Datasheet:

Part Number:
Description:
KIT PSOC MINIPROG3 PROGRAM DEBUG
Manufacturer:
Cypress Semiconductor Corp
Datasheet:

Part Number:
Description:
KIT EVAL POWERLINE HIGH VOLT
Manufacturer:
Cypress Semiconductor Corp
Datasheet:

Part Number:
Description:
KIT PSOC FIRST TOUCH
Manufacturer:
Cypress Semiconductor Corp
Datasheet:

Part Number:
Description:
EVAL KIT WORLDTOUR2
Manufacturer:
Cypress Semiconductor Corp
Datasheet:

Part Number:
Description:
KIT UNIVERSAL CAPSENSE CTRLR
Manufacturer:
Cypress Semiconductor Corp
Datasheet:
