ATMEGA128RFA1-ZU Atmel, ATMEGA128RFA1-ZU Datasheet - Page 315
ATMEGA128RFA1-ZU
Manufacturer Part Number
ATMEGA128RFA1-ZU
Description
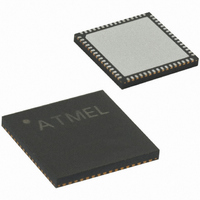
IC AVR MCU 2.4GHZ XCEIVER 64QFN
Manufacturer
Atmel
Series
ATMEGAr
Datasheets
1.ATMEGA128-16AU.pdf
(385 pages)
2.ATAVR128RFA1-EK1.pdf
(13 pages)
3.ATAVR128RFA1-EK1.pdf
(555 pages)
4.ATMEGA128RFA1-ZU.pdf
(524 pages)
Specifications of ATMEGA128RFA1-ZU
Frequency
2.4GHz
Data Rate - Maximum
2Mbps
Modulation Or Protocol
802.15.4 Zigbee
Applications
General Purpose
Power - Output
3.5dBm
Sensitivity
-100dBm
Voltage - Supply
1.8 V ~ 3.6 V
Current - Receiving
12.5mA
Current - Transmitting
14.5mA
Data Interface
PCB, Surface Mount
Memory Size
128kB Flash, 4kB EEPROM, 16kB RAM
Antenna Connector
PCB, Surface Mount
Operating Temperature
-40°C ~ 85°C
Package / Case
64-VFQFN, Exposed Pad
Rf Ic Case Style
QFN
No. Of Pins
64
Supply Voltage Range
1.8V To 3.6V
Operating Temperature Range
-40°C To +85°C
Svhc
No SVHC (15-Dec-2010)
Rohs Compliant
Yes
Processor Series
ATMEGA128x
Core
AVR8
Data Bus Width
8 bit
Program Memory Type
Flash
Program Memory Size
128 KB
Data Ram Size
16 KB
Interface Type
JTAG
Maximum Clock Frequency
16 MHz
Number Of Programmable I/os
38
Number Of Timers
6
Operating Supply Voltage
1.8 V to 3.6 V
Maximum Operating Temperature
+ 85 C
Mounting Style
SMD/SMT
3rd Party Development Tools
EWAVR, EWAVR-BL
Development Tools By Supplier
ATAVR128RFA1-EK1
Lead Free Status / RoHS Status
Lead free / RoHS Compliant
Available stocks
Company
Part Number
Manufacturer
Quantity
Price

Part Number:
ATMEGA128RFA1-ZU
Manufacturer:
ATMEL/爱特梅尔
Quantity:
20 000
Company:
Part Number:
ATMEGA128RFA1-ZUR
Manufacturer:
ON
Quantity:
56 000


Entering Programming
Mode
Leaving Programming
Mode
Performing Chip Erase 1. Enter JTAG instruction PROG_COMMANDS.
Programming the
Flash
2467V–AVR–02/11
1. Enter JTAG instruction AVR_RESET and shift 1 in the Reset Register.
2. Enter instruction PROG_ENABLE and shift 1010_0011_0111_0000 in the Programming
1. Enter JTAG instruction PROG_COMMANDS.
2. Disable all programming instructions by using no operation instruction 11a.
3. Enter instruction PROG_ENABLE and shift 0000_0000_0000_0000 in the programming
4. Enter JTAG instruction AVR_RESET and shift 0 in the Reset Register.
2. Start chip erase using programming instruction 1a.
3. Poll for chip erase complete using programming instruction 1b, or wait for t
Before programming the Flash a Chip Erase must be performed. See
on page
1. Enter JTAG instruction PROG_COMMANDS.
2. Enable Flash write using programming instruction 2a.
3. Load address high byte using programming instruction 2b.
4. Load address low byte using programming instruction 2c.
5. Load data using programming instructions 2d, 2e and 2f.
6. Repeat steps 4 and 5 for all instruction words in the page.
7. Write the page using programming instruction 2g.
8. Poll for Flash write complete using programming instruction 2h, or wait for t
9. Repeat steps 3 to 7 until all data have been programmed.
A more efficient data transfer can be achieved using the PROG_PAGELOAD instruction:
1. Enter JTAG instruction PROG_COMMANDS.
2. Enable Flash write using programming instruction 2a.
3. Load the page address using programming instructions 2b and 2c. PCWORD (refer to
4. Enter JTAG instruction PROG_PAGELOAD.
5. Load the entire page by shifting in all instruction words in the page, starting with the LSB
6. Enter JTAG instruction PROG_COMMANDS.
7. Write the page using programming instruction 2g.
8. Poll for Flash write complete using programming instruction 2h, or wait for t
9. Repeat steps 3 to 8 until all data have been programmed.
Enable Register.
Enable Register.
to
Table Note: on page
Table 123 on page
of the first instruction in the page and ending with the MSB of the last instruction in the
page.
Table Note: on page
Table Note: on page
315.
291) is used to address within one page and must be written as 0.
299).
299).
299).
“Performing Chip Erase”
ATmega128
WLRH_CE
WLRH
WLRH
(refer to
(refer to
(refer
315
Related parts for ATMEGA128RFA1-ZU
Image
Part Number
Description
Manufacturer
Datasheet
Request
R

Part Number:
Description:
Manufacturer:
ATMEL Corporation
Datasheet:
Part Number:
Description:
Microcontroller with 128K bytes In-system programmable flash, 8 MHz, power supply =2.7 - 5.5V
Manufacturer:
ATMEL Corporation
Datasheet:

Part Number:
Description:
IC AVR MCU 128K 16MHZ 5V 64TQFP
Manufacturer:
Atmel
Datasheet:

Part Number:
Description:
IC AVR MCU 128K 16MHZ 5V 64-QFN
Manufacturer:
Atmel
Datasheet:

Part Number:
Description:
IC AVR MCU 128K 16MHZ COM 64-QFN
Manufacturer:
Atmel
Datasheet:
Part Number:
Description:
IC AVR MCU 128K 16MHZ 64-TQFP
Manufacturer:
Atmel
Datasheet:
Part Number:
Description:
IC AVR MCU 128K 16MHZ 64-TQFP
Manufacturer:
Atmel
Datasheet:
Part Number:
Description:
IC AVR MCU 128K 16MHZ IND 64-QFN
Manufacturer:
Atmel
Datasheet:
Part Number:
Description:
MCU AVR 128KB FLASH 16MHZ 64TQFP
Manufacturer:
Atmel
Datasheet:
Part Number:
Description:
MCU AVR 128KB FLASH 16MHZ 64QFN
Manufacturer:
Atmel
Datasheet:
Part Number:
Description:
MCU AVR 128KB FLASH 16MHZ 64TQFP
Manufacturer:
Atmel
Datasheet: