PAXS0010 Red Lion Controls, PAXS0010 Datasheet - Page 14
PAXS0010
Manufacturer Part Number
PAXS0010
Description
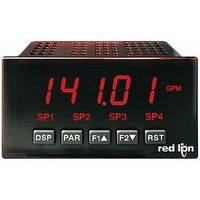
Strain Gauge Meter
Manufacturer
Red Lion Controls
Type
Strain Gager
Specifications of PAXS0010
No. Of Digits / Alpha
5
Meter Function
DC Millivoltmeter
Meter Range
± 24mV To ± 240mV
Digit Height
14.2mm
Power Consumption
11W
Operating Temperature Range
0°C To +50°C
Supply Voltage Dc, Min
11V
Accuracy
0.07% of Reading +4 µV
Brand/series
PAX
Character Height
0.56 in.
Connection Type
2-Wire (Single-Ended), 4-Wire Bridge (Differential)
Cut Out, Panel
1⁄8 DIN
Dimensions
4.2" L × 3.8" W × 1.95" H
Display Digit Height
0.56 "
Display Resolution
1 μV/10 μV
Display Type
LED
Function
Strain Gage
Input Type
Strain Gauge/Bridge Input
Number Of Digits
5
Primary Type
Electronic
Range, Measurement
±24/±240 mvDC
Special Features
Programmable Function Keys
Temperature Range
0 to +50 °C
Temperature, Storage
–40 to +60 °C
Termination
Cage Clamp
Voltage, Input
11-36 VDV, 24 VAC
Lead Free Status / RoHS Status
na


DISPLAY MODE
displays can be viewed consecutively by pressing the
annunciators to the left of the display indicate which display is currently shown;
Max Value (MAX), Min Value (MIN), or Totalizer Value (TOT). Each of these
displays can be locked from view through programming. (See Module 3) The
Input Display Value is shown with no annunciator.
PROGRAMMING MODE
Full Programming Mode permits all parameters to be viewed and modified.
Quick Programming Mode permits only certain parameters to be viewed
PROGRAMMING TIPS
modules group together parameters that are related in function. It is
recommended to begin programming with Module 1 and proceed through each
module in sequence. Note that Modules 6 through 8 are only accessible when
the appropriate plug-in option card is installed. If lost or confused while
programming, press the
When programming is complete, it is recommended to record the meter settings
on the Parameter Value Chart and lock-out parameter programming with a User
Input or lock-out code. (See Modules 2 and 3 for lock-out details.)
FACTORY SETTINGS
starting point if encountering programming problems. Throughout the module
description sections which follow, the factory setting for each parameter is
shown below the parameter display. In addition, all factory settings are listed on
the Parameter Value Chart following the programming section.
ALTERNATING SELECTION DISPLAY
arrows appears for each programming parameter. This is used to illustrate the
display alternating between the parameter (top display) and the parameter's
Factory Setting (bottom display). In most cases, selections or value ranges for
the parameter will be listed on the right.
5.0 P
The meter normally operates in the Display Mode. In this mode, the meter
Two programming modes are available.
Upon entering this mode, the front panel keys change to Programming Mode
operations. This mode should not be entered while a process is running, since
the meter functions and User Input response may not operate properly while
in Full Programming Mode.
and/or modified. When entering this mode, the front panel keys change to
Programming Mode operations, and all meter functions continue to operate
properly. Quick Programming Mode is configured in Module 3. The Display
Intensity Level “!"#$%” parameter is available in the Quick Programming
Mode only when the security code is non-zero. For a description, see Module
9—Factory Service Operations. Throughout this document, Programming
Mode (without Quick in front) always refers to “Full” Programming Mode.
The Programming Menu is organized into nine modules (See above). These
Factory Settings may be completely restored in Module 9. This is a good
In the module description sections which follow, the dual display with
Indicates Program Mode Alternating Display
Parameter
ROGRAMMING THE
"
#"$%&
DSP
key to exit programming mode and start over.
!"
#
Selection/Value
PROGRAMMING MENU
DSP
key. The
OVERVIEW
M
14
ETER
STEP BY STEP PROGRAMMING INSTRUCTIONS:
PROGRAMMING MODE ENTRY (PAR KEY)
not accessible, then meter programming is locked by either a security code or a
hardware lock. (See Modules 2 and 3 for programming lock-out details.)
MODULE ENTRY (ARROW & PAR KEYS)
and the present module (initially )*). The arrow keys (
to select the desired module, which is then entered by pressing the
PARAMETER (MODULE) MENU (PAR KEY)
start of each module description section which follows. The
to advance to a particular parameter to be changed, without changing the
programming of preceding parameters. After completing a module, the display
will return to &'( )*. From this point, programming may continue by selecting
and entering additional modules. (See MODULE ENTRY above.)
PARAMETER SELECTION ENTRY (ARROW & PAR KEYS)
present selection or value for that parameter. For parameters which have a list
of selections, the arrow keys (
list until the desired selection is displayed. Pressing the
activates the displayed selection, and also advances the meter to the next
parameter.
NUMERICAL VALUE ENTRY (ARROW, RST & PAR KEYS)
used to increment or decrement the display to the desired value. When an arrow
key is pressed and held, the display automatically scrolls up or scrolls down.
The longer the key is held, the faster the display scrolls.
numerical values. When the
display scrolls by 1000’s. Pressing the
displayed value, and also advances the meter to the next parameter.
PROGRAMMING MODE EXIT (DSP KEY or PAR KEY at
in the Programming Mode) or the
commit any stored parameter changes to memory and return the meter to the
Display Mode. If a parameter was just changed, the
to store the change before pressing the
returning to the Display Mode, verify recent parameter changes.)
The Programming Mode is entered by pressing the
Upon entering the Programming Mode, the display alternates between &'(
Each module has a separate parameter menu. These menus are shown at the
For each parameter, the display alternates between the parameter and the
For parameters which require a numerical value entry, the arrow keys can be
The
The Programming Mode is exited by pressing the
RST
key can be used in combination with the arrow keys to enter large
RST
F1!
key is pressed along with an arrow key, the
PAR
and
F2"
DSP
key (with &'( )* displayed). This will
PAR
) are used to sequence through the
key. (If power loss occurs before
key stores and activates the
PAR
DSP
PAR
F1!
key should be pressed
PAR
key (from anywhere
key. If this mode is
PAR
and
key stores and
F2"
key is pressed
PAR
) are used
&'( )*
key.
)
Related parts for PAXS0010
Image
Part Number
Description
Manufacturer
Datasheet
Request
R

Part Number:
Description:
Counter
Manufacturer:
Red Lion Controls
Datasheet:
Part Number:
Description:
Miniature Length Sensor
Manufacturer:
Red Lion Controls
Datasheet:
Part Number:
Description:
Model Lsc - Single Channel Output Length Sensor
Manufacturer:
Red Lion Controls
Datasheet: