PAXS0010 Red Lion Controls, PAXS0010 Datasheet - Page 24
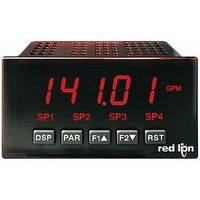
PAXS0010
Manufacturer Part Number
PAXS0010
Description
Strain Gauge Meter
Manufacturer
Red Lion Controls
Type
Strain Gager
Specifications of PAXS0010
No. Of Digits / Alpha
5
Meter Function
DC Millivoltmeter
Meter Range
± 24mV To ± 240mV
Digit Height
14.2mm
Power Consumption
11W
Operating Temperature Range
0°C To +50°C
Supply Voltage Dc, Min
11V
Accuracy
0.07% of Reading +4 µV
Brand/series
PAX
Character Height
0.56 in.
Connection Type
2-Wire (Single-Ended), 4-Wire Bridge (Differential)
Cut Out, Panel
1⁄8 DIN
Dimensions
4.2" L × 3.8" W × 1.95" H
Display Digit Height
0.56 "
Display Resolution
1 μV/10 μV
Display Type
LED
Function
Strain Gage
Input Type
Strain Gauge/Bridge Input
Number Of Digits
5
Primary Type
Electronic
Range, Measurement
±24/±240 mvDC
Special Features
Programmable Function Keys
Temperature Range
0 to +50 °C
Temperature, Storage
–40 to +60 °C
Termination
Cage Clamp
Voltage, Input
11-36 VDV, 24 VAC
Lead Free Status / RoHS Status
na


10. Keeping all programming the same, view the Input Display.
11. The readout now displays the AC coupled zero input, record the value.
12. In Module 9, Use the arrow keys to display
13. Press the down arrow key twice to
14. Calculate the offset
15. Use the arrow keys to enter the calculated
16. Press PAR three times, to exit programming.
17. Remove the meter power and remove the short from terminals 4 and 6.
18. Restore the original jumper and configuration settings.
allows a single ended signal to be used for calibration. Connect the calibration
signal to +SIG (terminal 3) and -SIG (terminal 4). Verify the Input Range
jumper is in the desired position. Allow a 30 minute warm-up period before
calibrating the meter.
without any changes taking place. Perform the following procedure:
1. Press the arrow keys to display
2. Choose the range to be calibrated by using the arrow keys and press PAR.
3. When the zero range limit appears on the display, apply 0 mV between +SIG
4. Press PAR and ---- will appear, wait for next prompt.
5. When the top range limit appears on the display, apply the corresponding
6. Press PAR and ---- will appear, on the display for about 10 seconds.
7. When
8. Repeat the above procedure for each range to be calibrated or to recalibrate
9. When all desired calibrations are completed, remove -SIG to COMM
10. Restore original configuration and jumper settings.
must be at 0 mV or 0 ohms. Set the digital filer in Module 1 to 1 second. Allow
a 30 minute warm-up period before calibrating the meter. The
be chosen to exit calibration mode without any changes taking place.
10 OHM RTD Range Calibration
1. Set the Input Range Jumper to 10 ohm.
2. Use the arrow keys to display
3. At
4. At
5. Connect the RTD, return to the Display Mode and verify the input reading
AC Couple Offset Calibration - PAXH
1. With meter power removed, set the Input Range Jumper for 20 V, the Couple
2. Connect a wire (short) between Volt (terminal 6) and COMM (terminal 4).
3. Apply meter power.
4. In Module 1, program as follows: Range:
5. In Module 4, program as follows: Hi-t:
6. Press PAR then DSP to exit programming and view the Input Display.
7. The readout displays the DC coupled zero input, record the value.
8. Remove the meter power and set the Couple Jumper to AC by removing the
9. Maintaining the short between terminals 4 and 6, reapply the meter power.
PAXS - Input Calibration
PAXT - Input Calibration
It is recommended that Input Calibration be performed first.
Jumper for DC, and set the Signal Jumper for voltage by removing the jumper.
-
-
jumper.
Before starting, connect -SIG (terminal 4) to COMM (terminal 5). This
and -SIG.
+SIG and -SIG voltage (20 mV or 200 mV).
the same range. It is only necessary to calibrate the input ranges being used.
connection and external signal source.
Before selecting any of the calibration procedures, the input to the meter
and press PAR.
link. Wait 10 seconds, then press PAR.
or better) using a three wire link, to input terminals 3, 4 and 5. Wait 10
seconds, then press PAR.
(with 0 Display Offset) is correct. If not correct repeat calibration.
; Round:
; INP2:
3! #
- #
)>>:6
WARNING: Calibration of this meter requires a signal source with an
Warning: Calibration of this meter requires precision instrumentation
$)
, apply a direct short to input terminals 3, 4 and 5 using a three wire
accuracy of 0.01% or better and an external meter with an accuracy of
0.005% or better.
, apply a precision resistance of 15 ohms (with an accuracy of 0.01%
operated by qualified technicians. It is recommended that a
calibration service calibrates the meter.
/-. - --
appears, press PAR twice to exit programming.
3
= AC coupled reading (step 11) - DC coupled reading (step 7)
; Filter:
; DSP2:
-. !
;5
)>>:6
; Band:
and PAR can be chosen to exit the calibration mode
/----
using the following formula:
/-
(5?& HN
()?& HN
; Points:
"(8)>
-. -
and press PAR. Then choose
/
and press PAR.
/-1
; Lo-t:
; Style:
and press PAR.
)>>:6
(5?& HN
; Couple:
0/J3. 3
.
4&C
; INP1:
and press PAR.
?(
;5
; Decimal Point:
-. - --
and PAR can
; DSP1:
# 8 3-
24
100 OHM RTD Range Calibration
1. Set the Input Range Jumper to 100 ohm.
2. Use the arrow keys to display
3. At
4. At
5. Connect the RTD, return to the Display Mode and verify the input reading
THERMOCOUPLE Range Calibration
1. Use the arrow keys to display
2. At
3. At
4. Return to the Display Mode.
5. Continue with Ice Point Calibration.
ICE POINT Calibration
1. Remove all option cards or invalid results will occur.
2. The ambient temperature must be within 20 C to 30 C.
3. Connect a thermocouple (types T, E, J, K, or N only) with an accuracy of 1 C
4. Verify the readout Display Offset is 0, Temperature Scale is C, Display
5. Place the thermocouple in close thermal contact to a reference thermometer
6. In the Normal Display mode, compare the readouts.
7. If a difference exists then continue with the calibration.
8. Enter Module 9, use the arrow keys to display
9. Calculate a new Ice Point value using: existing Ice Point value + (reference
10. Enter the new Ice Point value.
11. Return to the Display Mode and verify the input reading (with 0 Display
ANALOG OUTPUT CARD CALIBRATION
meter (current output) is connected and ready. Perform the following procedure:
1. Use the arrow keys to display
2. Use the arrow keys to choose
3. Using the chart below, step through the five selections to be calibrated. At
4. When
and press PAR.
link. Wait 10 seconds, then press PAR.
0.01% or better) using a three wire link, to terminals 3, 4 and 5. Wait 10
seconds, press PAR.
(with 0 Display Offset) is correct. If not correct repeat calibration.
press PAR.
5. Wait 10 seconds, then press PAR.
better) to input terminals 4 and 5. Wait 10 seconds, then press PAR.
or better to the meter.
Resolution is 0.0, and the Input Range is set for the connected thermocouple.
probe. (Use a reference thermometer with an accuracy of 0.25 C or better.)
The two probes should be shielded from air movement and allowed sufficient
time to equalize in temperature. (A calibration bath could be used in place of
the thermometer.)
choose
temperature - Display Mode reading). All values are based on C.
Offset) is correct. If not correct repeat steps 8 through 10.
Before starting, verify that the precision voltmeter (voltage output) or current
each prompt, use the PAX arrow keys to adjust the external meter display to
match the selection being calibrated. When the external reading matches, or
if this range is not being calibrated, press PAR.
SELECTION
- #
-. - 1
0-- #
!-. - 1
/-. - K"
-. - K"
H. - K"
3-. - 1
-. - 1
$)
, apply a direct short to input terminals 3, 4 and 5 using a three wire
A(&
, apply a dead short or set calibrator to zero to input terminals 4 and
appears remove the external meters and press PAR twice.
, apply a precision resistance of 300 ohms (with an accuracy of
, apply 50.000 mV input signal (with an accuracy of 0.01% or
and press PAR.
EXTERNAL METER
20.00
10.00
0.00
4.00
0.00
(5?& HN
(5?& HN
)*6
(5?& HN
and press PAR.
Adjust if necessary, press PAR
Adjust if necessary, press PAR
Adjust if necessary, press PAR
Adjust if necessary, press PAR
Adjust if necessary, press PAR
and press PAR. Then choose
and press PAR. Then choose
and press PAR.
(5?& HN
ACTION
and press PAR. Then
#83--
6(
and
Related parts for PAXS0010
Image
Part Number
Description
Manufacturer
Datasheet
Request
R

Part Number:
Description:
Counter
Manufacturer:
Red Lion Controls
Datasheet:
Part Number:
Description:
Miniature Length Sensor
Manufacturer:
Red Lion Controls
Datasheet:
Part Number:
Description:
Model Lsc - Single Channel Output Length Sensor
Manufacturer:
Red Lion Controls
Datasheet: