CY3220LINBUS-RD Cypress Semiconductor Corp, CY3220LINBUS-RD Datasheet - Page 37
CY3220LINBUS-RD
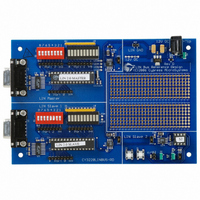
Manufacturer Part Number
CY3220LINBUS-RD
Description
KIT REF DESIGN LIN BUS
Manufacturer
Cypress Semiconductor Corp
Series
PSoC®r
Datasheet
1.CY3220LINBUS-RD.pdf
(64 pages)
Specifications of CY3220LINBUS-RD
Main Purpose
Interface, LIN
Embedded
Yes, MCU, 8-Bit
Utilized Ic / Part
CY8C27143, CY8C27443
Processor To Be Evaluated
CY8C27143-24PXI and CY8C27443-24PXI
Interface Type
RS-232
Lead Free Status / RoHS Status
Contains lead / RoHS non-compliant
Lead Free Status / RoHS Status
Lead free / RoHS Compliant, Contains lead / RoHS non-compliant
Other names
428-1926


LIN Bus 2.0 Reference Design
4.6
Follow these steps to create a LIN slave node using the
Design IP.
4.6.1
There are two possible ways to import the design. One is to
create a new project and use the design-based project
option. The other way is to create your project and then
import the design using the Design Browser. The best
method is to create a new design-based project.
1. Select
2. Select the directory in which to create the project files.
3. Select the directory and name for a project.
4. The Design Browser opens. The Design Browser has
5. Below the Design Browser window, there are two radio
6. In the configurations list, locate the Synchro Reception
7. Click OK.
8. In the Device Selection window, select the device to use
9. Select “Generate main file using C.”
10. Select Device Editor as the Designer State to proceed
11. Click Finish.
12. A Design Import Status window opens and displays the
October 25, 2006
File >> New Project >> Create Design-Based Project.
two windows. The window on the left side is the Design
Browser itself where you select the design. The window
on the right side shows the data sheet for the selected
design. On the top of the Design Browser window there
are two radio buttons that select between “Browse File
System” and “Select From Design Catalog.” Click the
"Browse File System" option. Navigate to the "\Design
IP\LinSlaveNode" directory on the CD, and open the
folder corresponding to the device that you want to use.
Then select the .cfg file in this directory. Now the data
sheet window on the right shows the data sheet of the
LIN slave design.
There are two designs available for the CY8C21x34
device. The Lin20_Slave_21x34_2DB design uses only
2 digital blocks for the design, but uses VC3 for generat-
ing the baud clock. Choose this design if you require
more digital blocks for your main application. As VC3 is
used by LIN 2.0, this design cannot implement an ADC
in the main application. If an ADC is desired in the main
application, use the Lin20_Slave_21x34_3DB design.
This design uses 3 digital blocks for the LIN and VC3 is
not used. Therefore, an ADC may be placed in the main
application.
buttons, “Overwrite configurations with same name” and
“Resolve configuration name conflicts.” Use these
options when importing a design into an already-existing
project and if some of the configurations from the exist-
ing project have the same name as that of the imported
design.
and Data Reception configurations.
in your project.
to.
import status.
Using the Design IP
Importing the Design
Cypress Semiconductor – Rev. **
13. When the design is imported, the PSoC Designer opens
14. You should see three configurations. The base configu-
15. Go to Project >> Settings, Device Editor tab. In the con-
16. Switch to the base configuration and select all the user
4.6.2
Switch to the Interconnect View and select the base configu-
ration. The first step is to configure all the global resources
related to the LIN design. Remember that whatever changes
you make to the base configuration are reflected in the other
reloadable configurations.
1. Set CPU speed to 24 MHz. (Set the CPU speed to 12
2. Set VC3 source to SysClk/1.
3. Set VC3 divider to 6.
These are the only three global resources that are required
for the LIN. You set all the other resources according to the
requirements of your main application.
4.6.3
The next step is to decide the TX and RX pins of your LIN
bus and to properly select their drive modes in all the config-
urations. Follow these steps carefully.
1. Switch to the base configuration. Use the Config >>
2. In the GPIO configuration pane, rename the port pin that
3. In the Select column of the RX pin, select the
4. In the Select column of the TX pin, select the
5. Switch to Synchro Reception and Data Reception con-
6. Switch to Synchro Reception Configuration. Change the
7. Change the interrupt mode of the RX pin to Change-
The GPIO configuration is complete. After this, you modify
the GPIO of the other port pins according to your project
requirements. Whenever a modification is done in the base
configuration, the same configuration is updated in the Syn-
chro Reception and Data Reception configurations, so that
the Device Editor configuration.
ration with your project name, the Synchro Reception
Configuration and the Data Reception Configuration.
figuration initialization type, select “Direct Write (Speed
Efficient).”
modules to include in your main application.
MHz for the CY8C27x43 automotive grade device.)
Restore default pinout. All the pins in the GPIO configu-
ration pane become StdCPU, High Z Analog, DisableInt.
Now repeat this step for the Synchro Reception and
Data Reception configurations also.
you want as Rx to “RX.” Then rename the pin that you
want to be the Tx as “TX.” Type these names in capital
letters.
GlobalInOdd_x or GlobalInEven_x. The drive mode
automatically becomes High Z.
GlobalOutOdd_x or GlobalOutEven_x. The drive mode
automatically becomes Strong.
figurations and confirm that these changes are reflected
in both configurations.
TX pin to StdCPU, High Z.
FromRead.
Configuring Global Resources
Configuring GPIO
4. Slave Design IP
35
Related parts for CY3220LINBUS-RD
Image
Part Number
Description
Manufacturer
Datasheet
Request
R

Part Number:
Description:
KIT DEMO PSOC CAPSENSE
Manufacturer:
Cypress Semiconductor Corp
Datasheet:

Part Number:
Description:
KIT DEMO PSOC CAPSENSE SLIDE
Manufacturer:
Cypress Semiconductor Corp

Part Number:
Description:
Manufacturer:
Cypress Semiconductor Corp
Datasheet:
Part Number:
Description:
Manufacturer:
Cypress Semiconductor Corp
Datasheet:
Part Number:
Description:
Manufacturer:
Cypress Semiconductor Corp
Datasheet:
Part Number:
Description:
Manufacturer:
Cypress Semiconductor Corp
Datasheet:
Part Number:
Description:
Manufacturer:
Cypress Semiconductor Corp
Datasheet: