Chameleon-AVR Nurve Networks, Chameleon-AVR Datasheet - Page 100
Chameleon-AVR
Manufacturer Part Number
Chameleon-AVR
Description
MCU, MPU & DSP Development Tools AVR8 & PROPELLER DEV SYSTEM (SBC)
Manufacturer
Nurve Networks
Datasheet
1.CHAMELEON-AVR.pdf
(268 pages)
Specifications of Chameleon-AVR
Processor To Be Evaluated
AVR 328P
Data Bus Width
8 bit
Interface Type
USB, VGA, PS/2, I2C, ISP, SPI
Operating Supply Voltage
3.3 V, 5 V
Lead Free Status / RoHS Status
Lead free / RoHS Compliant


© 2009 NURVE NETWORKS LLC “Exploring the Chameleon AVR 8-Bit”
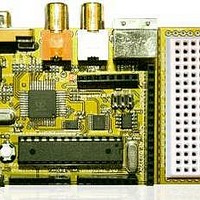
Figure 15.35 – Plugging the AVR ISP MKII into the Chameleon AVR properly.
When you are ready to go, the Chameleon AVR is connected to the AVR ISP and powered up. Go ahead and plug in the
9V DC power supply or make sure the USB cable is plugged into your PC then turn the unit on by sliding the power switch
to the left. Now, hold your breath and click <Connect>… If all goes well AVR Studio will start sending communication
packets to the AVR ISP which in-turn will communicate with the ISP port on the Chameleon AVR and talk to the chip
querying it. If a communications channel is successfully opened then the AVR ISP MKII control panel will open up as
shown in Figure 15.36
Figure 15.36 – The AVR ISP MKII control panel’s “Main” tab.
The control panel might launch starting with another tab, so go ahead and select the “Main” tab as shown in Figure
15.36, so you can follow the setup steps. This control panel sets up the AVR ISP programmer and can perform many
100
Related parts for Chameleon-AVR
Image
Part Number
Description
Manufacturer
Datasheet
Request
R

Part Number:
Description:
MCU, MPU & DSP Development Tools PIC24 & PROPELLER DEV SYSTEM (SBC)
Manufacturer:
Nurve Networks
Datasheet:

Part Number:
Description:
MCU, MPU & DSP Development Tools AVR8 VIDEO GAME DEV SYSTEM (SBC)
Manufacturer:
Nurve Networks

Part Number:
Description:
MCU, MPU & DSP Development Tools PIC24 VIDEO GAME DEV SYSTEM (SBC)
Manufacturer:
Nurve Networks