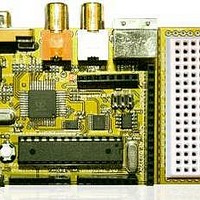
Chameleon-AVR Nurve Networks, Chameleon-AVR Datasheet - Page 33

Chameleon-AVR
Manufacturer Part Number
Chameleon-AVR
Description
MCU, MPU & DSP Development Tools AVR8 & PROPELLER DEV SYSTEM (SBC)
Manufacturer
Nurve Networks
Datasheet
1.CHAMELEON-AVR.pdf
(268 pages)
Specifications of Chameleon-AVR
Processor To Be Evaluated
AVR 328P
Data Bus Width
8 bit
Interface Type
USB, VGA, PS/2, I2C, ISP, SPI
Operating Supply Voltage
3.3 V, 5 V
Lead Free Status / RoHS Status
Lead free / RoHS Compliant
- Current page: 33 of 268
- Download datasheet (17Mb)
© 2009 NURVE NETWORKS LLC “Exploring the Chameleon AVR 8-Bit”
6.0 USB Serial UART
Figure 6.1 – The FTDI USB to Serial UART.
Referring to Figure 6.1, this is the USB to serial converter designed into the Chameleon AVR. Its based on a FTDI
FT232R USB to serial UART chip. The chip works by converting a USB packet stream into a standard serial port signal
set. Of course, the other end of the USB cable has to be plugged in a PC running the custom FTDI USB drivers that
create “virtual” COM ports from the operating system’s perspective, but other than that. This magical little chip let’s us talk
serial to the Chameleon with a USB port. FTDI has written drivers for Windows, Linux, and Mac OS X, so these chips are
quite popular since its very difficult to find a real DB9 RS-232 serial port on a PC anymore. You can take a look at the data
sheet for the chip here:
DVD-ROM: \ CHAM_AVR \ DOCS \ DATASHEETS \ DS_FT232R.pdf
Considering all that, let’s take a quick look at the design. The USB cable from the PC plugs into H1 (which is a Mini-B
USB header) the USB packets are converted into a serial stream by the chip and the standard RS-232 signals are
generated by the chip. We are only interested in TX/RX and DTR (data terminal ready) which is used to reset the
Propeller and AVR by both the Propeller tool and Arduino tools respectively. The TX/RX signals are routed to both the
Propeller and AVR chips where they are interfaced to the appropriate I/O pins. Additionally, at the top of the schematic
you see the signal USB_5VOUT, this is the power coming in from the USB port header, this is routed to the system as 5V
power when there is no external 9V supply plugged in. However, if you are going to use the Chameleon without a 9V
power supply and power it from the USB port, I highly recommend you use a powered USB hub since the Chameleon will
draw up to 200mA or more as it throttles its performance and powers up all its peripherals.
33
Related parts for Chameleon-AVR
Image
Part Number
Description
Manufacturer
Datasheet
Request
R

Part Number:
Description:
MCU, MPU & DSP Development Tools PIC24 & PROPELLER DEV SYSTEM (SBC)
Manufacturer:
Nurve Networks
Datasheet:

Part Number:
Description:
MCU, MPU & DSP Development Tools AVR8 VIDEO GAME DEV SYSTEM (SBC)
Manufacturer:
Nurve Networks

Part Number:
Description:
MCU, MPU & DSP Development Tools PIC24 VIDEO GAME DEV SYSTEM (SBC)
Manufacturer:
Nurve Networks


