Chameleon-AVR Nurve Networks, Chameleon-AVR Datasheet - Page 210
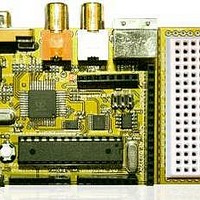
Chameleon-AVR
Manufacturer Part Number
Chameleon-AVR
Description
MCU, MPU & DSP Development Tools AVR8 & PROPELLER DEV SYSTEM (SBC)
Manufacturer
Nurve Networks
Datasheet
1.CHAMELEON-AVR.pdf
(268 pages)
Specifications of Chameleon-AVR
Processor To Be Evaluated
AVR 328P
Data Bus Width
8 bit
Interface Type
USB, VGA, PS/2, I2C, ISP, SPI
Operating Supply Voltage
3.3 V, 5 V
Lead Free Status / RoHS Status
Lead free / RoHS Compliant


If you haven’t copied the new libraries into this directory then you should do so now. They are located on the DVD ROM in
the following location:
Assuming, you have the libraries directory setup with all the new Chameleon specific libraries for NTSC, VGA, sound,
FLASH, serial, keyboard, mouse, etc. The next thing we need to do is actually copy the pre-made “Sketches” into your
local sketch directory, so you don’t have to build each sketch yourself.
Copying the Sketches from DVD
To save you time for each demo construction, I have pre-built a sketch for each demo. In essence, I took the program as I
developed it in AVRStudio, then create a sketch with the same root name, then saved it. Of course, I performed any
porting operations like changing header include syntax, changing main() to loop() etc. But, more or less just a couple
minutes each to port each program in most cases. All the ported sketches are located on the DVD here:
Simply copy the contents of this directory (which contains a number of sub-directories, each representing a sketch) into
your local hard drive where you installed the Arduino tool and its Sketches\ directory. After copying, re-start the Arduino
tool to make sure they are scanned.
Now, you are ready to go for the Arduino versions as well.
27.1.3 Setting the Chameleon Hardware Up
Finally, let’s take a brief moment to remind ourselves what’s going on with the hardware. If you are using AVRStudio, then
you are going to build a project for each demo, or change a single project, re-build and FLASH the file to the Chameleon
AVR with the AVR ISP MKII programmer. If you don’t own a programmer, then you will use the Chameleon in Arduino
mode, and thus, you need the bootlooder on the Chameleon (which we deliver the unit with). In this case, make sure you
Figure 27.2 – The Libraries directory which contains both the default Arduino libraries as well as our custom
DVD-ROM:\ CHAM_AVR \ TOOLS \ ARDUINO \ LIBRARIES
DVD-ROM: \ CHAM_AVR \ TOOLS \ ARDUINO \ SKETCHES \ *.*
TIP
If the Arduino tool is running make sure to quit the application and restart, so the tool
can scan the Libraries directory and add them to the IDE’s <Sketch → Import Library>
menu option.
libraries.
© 2009 NURVE NETWORKS LLC “Exploring the Chameleon AVR 8-Bit”
210
Related parts for Chameleon-AVR
Image
Part Number
Description
Manufacturer
Datasheet
Request
R

Part Number:
Description:
MCU, MPU & DSP Development Tools PIC24 & PROPELLER DEV SYSTEM (SBC)
Manufacturer:
Nurve Networks
Datasheet:

Part Number:
Description:
MCU, MPU & DSP Development Tools AVR8 VIDEO GAME DEV SYSTEM (SBC)
Manufacturer:
Nurve Networks

Part Number:
Description:
MCU, MPU & DSP Development Tools PIC24 VIDEO GAME DEV SYSTEM (SBC)
Manufacturer:
Nurve Networks