Chameleon-AVR Nurve Networks, Chameleon-AVR Datasheet - Page 105
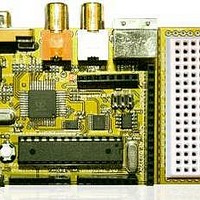
Chameleon-AVR
Manufacturer Part Number
Chameleon-AVR
Description
MCU, MPU & DSP Development Tools AVR8 & PROPELLER DEV SYSTEM (SBC)
Manufacturer
Nurve Networks
Datasheet
1.CHAMELEON-AVR.pdf
(268 pages)
Specifications of Chameleon-AVR
Processor To Be Evaluated
AVR 328P
Data Bus Width
8 bit
Interface Type
USB, VGA, PS/2, I2C, ISP, SPI
Operating Supply Voltage
3.3 V, 5 V
Lead Free Status / RoHS Status
Lead free / RoHS Compliant


15.1.7 Final Words on AVR Studio Tool Chain Installation
This completes our installation of the toolchain all its components and a complete example of building and downloading
an application. As we develop applications, load demos, and experiment, you will only have to modify the source files in
the project pane to the left adding and subtracting source files. The programming tool setup should be the same. Thus,
the workflow moving forward will be to add/subtract files from the “Source Files” folder of the same project, then
“Rebuild All” from the Main Menu’s “Build” menu then using the AVR ISP programming tool control panel “Program”
the Chameleon AVR with the new binary. That’s it!
15.2 Arduino Toolchain Setup
The Chameleon AVR ships with the Arduino bootloader pre-loaded into the AVR’s flash memory. This allows you to
immediately use the Chameleon as an Arduino (more or less), but with added media abilities via the Propeller chip.
Without the Arduino bootloader on the AVR chip, you would have to use the AVR ISP MKII programmer or something else
to get code into the AVR chip. But, with the Arduino bootlooader, the Arduino tool talks to the AVR chip over a serial port
(via the USB serial port on the Chameleon) and you can compiler and download programs. Figure 15.41 shows the
relationship between the components of an Arduino like setup.
TIP
Once you get your AVR Studio and the AVRISP (or other programmer) talking to the
Chameleon AVR then you can slowly increase the programming rate from 125 KHz. I
have mine set for 1 MHz and works fine, but I suggest slow moves. If you get a glitch in
communications and some fuse bits get set wrong you will be stuck and need a JTAG
programmer potentially to unlock your chip. So after you get it working at 125 KHz, then
try 250 KHz, 500 KHz , 1 MHz, and that’s as high as I would go. 2 MHz will work, but its
risky.
Figure 15.41 – The Arduino system setup with the Chameleon.
© 2009 NURVE NETWORKS LLC “Exploring the Chameleon AVR 8-Bit”
105
Related parts for Chameleon-AVR
Image
Part Number
Description
Manufacturer
Datasheet
Request
R

Part Number:
Description:
MCU, MPU & DSP Development Tools PIC24 & PROPELLER DEV SYSTEM (SBC)
Manufacturer:
Nurve Networks
Datasheet:

Part Number:
Description:
MCU, MPU & DSP Development Tools AVR8 VIDEO GAME DEV SYSTEM (SBC)
Manufacturer:
Nurve Networks

Part Number:
Description:
MCU, MPU & DSP Development Tools PIC24 VIDEO GAME DEV SYSTEM (SBC)
Manufacturer:
Nurve Networks