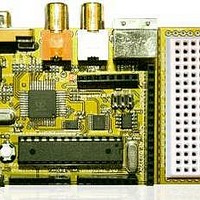
Chameleon-AVR Nurve Networks, Chameleon-AVR Datasheet - Page 99

Chameleon-AVR
Manufacturer Part Number
Chameleon-AVR
Description
MCU, MPU & DSP Development Tools AVR8 & PROPELLER DEV SYSTEM (SBC)
Manufacturer
Nurve Networks
Datasheet
1.CHAMELEON-AVR.pdf
(268 pages)
Specifications of Chameleon-AVR
Processor To Be Evaluated
AVR 328P
Data Bus Width
8 bit
Interface Type
USB, VGA, PS/2, I2C, ISP, SPI
Operating Supply Voltage
3.3 V, 5 V
Lead Free Status / RoHS Status
Lead free / RoHS Compliant
- Current page: 99 of 268
- Download datasheet (17Mb)
From the Main Menu select <Tools → Program AVR → Connect>, this is shown in Figure 15.33 below.
This should bring up the AVR programmer selection tool as shown in Figure 14.34 below.
This tool selects which “Platform” you want to use for your programming/debugging (left list box), and then in the right list
box for the tool selected it lists the available communication devices, in this case only “USB” is listed, go ahead and
select “AVRISP mkII” and “USB” as shown in the figure and then click connect. Make sure you have the AVR ISP USB
cable connected to the PC and the 2x5 header cable from the AVR ISP programmer is plugged into the Chameleon AVR
itself as shown in Figure 15.35.
WARNING!
At this point, make sure the AVR ISP MK II is plugged into a USB port on the PC and
the programmer itself is plugged into the Chameleon AVR’s ISP port as shown in
Figure 15.34. Pay attention to the pin out (the red line should be at the top). Finally,
make sure the Chameleon’s power cable is plugged in and the unit is powered up and
ON.
Figure 15.33 – Launching the programmer selection tool.
Figure 15.34 – The AVR programmer selection tool.
© 2009 NURVE NETWORKS LLC “Exploring the Chameleon AVR 8-Bit”
99
Related parts for Chameleon-AVR
Image
Part Number
Description
Manufacturer
Datasheet
Request
R

Part Number:
Description:
MCU, MPU & DSP Development Tools PIC24 & PROPELLER DEV SYSTEM (SBC)
Manufacturer:
Nurve Networks
Datasheet:

Part Number:
Description:
MCU, MPU & DSP Development Tools AVR8 VIDEO GAME DEV SYSTEM (SBC)
Manufacturer:
Nurve Networks

Part Number:
Description:
MCU, MPU & DSP Development Tools PIC24 VIDEO GAME DEV SYSTEM (SBC)
Manufacturer:
Nurve Networks


