Chameleon-AVR Nurve Networks, Chameleon-AVR Datasheet - Page 175
Chameleon-AVR
Manufacturer Part Number
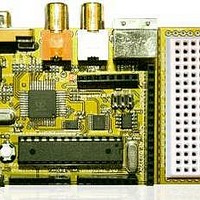
Chameleon-AVR
Description
MCU, MPU & DSP Development Tools AVR8 & PROPELLER DEV SYSTEM (SBC)
Manufacturer
Nurve Networks
Datasheet
1.CHAMELEON-AVR.pdf
(268 pages)
Specifications of Chameleon-AVR
Processor To Be Evaluated
AVR 328P
Data Bus Width
8 bit
Interface Type
USB, VGA, PS/2, I2C, ISP, SPI
Operating Supply Voltage
3.3 V, 5 V
Lead Free Status / RoHS Status
Lead free / RoHS Compliant


22.0 GFX Library Module Primer
The basic premise of the Chameleon design is that it leverages drivers running on the Propeller chip to do all the media
and graphics. Thus, whatever features the particular driver running on the Propeller side is the only features we can
access via the AVR side. That doesn’t mean we can’t abstract functionality and add higher level functions that build on the
sub-functions, however, this probably isn’t productive since you will want to change drivers, re-write the Propeller driver
and so forth. Thus, for the majority of the “media” drivers all the API functions do (including the GFX) is expose some of
the base functionality in nice function calls so you don’t have to send SPI messages yourself. In the case of the NTSC
driver (CHAM_DEFAULT2_DRV_112.SPIN), we are using the following Propeller Object for the NTSC tile engine and
text display:
CHAM_GFX_DRV_001_TB_001.spin – This is the enhanced NTSC only text/tile engine with support for terminal mode
Now, keep in mind the GFX library functions are only supported with the Default2 driver(s) and only work on the NTSC
screen. I wrote this driver myself to fit into a single Propeller core, but give you some decent control of the tile maps,
bitmaps, palettes, scrolling, and colors. The tile engine has two layers of functionality. The topmost layer is the “console”
or “terminal” layer which acts like a simple VT100 terminal, you print to it, it scrolls, you can clear the screen etc. This
functionality give you the base abilities to write applications that only need basic text output. Moreover, we selected the
NTSC and VGA drivers in both the Default1 and Default2 example drivers to support exactly the same commands. So
applications written to drive the VGA terminal work exactly the same on Default1, Default2, or with a simple change of
function calls from “VGA” to “NTSC” they will work on the NTSC screen. That said, if you want to do “gaming” tile based
graphics, right now, as is, you have to use the Default2 driver CHAM_DEFAULT2_DRV_112.SPIN, and only the NTSC
screen output is supported.
But, again, the point is, you can change the Propeller driver and re-write it as you wish, we simply give you a starting point
to get going with. So, if you want to know what the driver supports, you can always peek into the driver itself
CHAM_GFX_DRV_001_TB_001.spin and see the messages that are getting passed to it, you always look into the
CHAM_DEFAULT2_DRV_112.SPIN driver itself.
With that in mind, if you want to use the GFX NTSC driver then you need add both the base NTSC driver along with the
GFX API as well to your project:
22.1 GFX Driver Architectural Overview
The idea of the Chameleon is that you use other people’s drivers, make your own and change them as you need them on
the Propeller side. Thus, we don’t want to spend too much time explaining how any particular driver works since you will
CHAM_AVR_NTSC_DRV_V010.c
CHAM_AVR_NTSC_DRV_V010.h
CHAM_AVR_GFX_DRV_V010.c
CHAM_AVR_GFX_DRV_V010.h
ARDUINO
TIP
Arduino tool users you will use the “Import Library” command from the main menu to
include CHAM_AVR_NTSC_DRV_V010 as well as CHAM_AVR_GFX_DRV_V010,
however all this really does is add the line of code:
#include <CHAM_AVR_NTSC_DRV_V010.h>
#include <CHAM_AVR_GFX_DRV_V010.h>
To your program, which you can just do yourself. The Arduino tool already knows where
to look for other C/C++ files (since we copied them into the appropriate directories
already), thus for the Arduino tool simply add the header include manually or you can let
the tool do it from the main menu <Sketch -> Import Library>. The Arduino MAKE file is
rather complex and knows how to add all the C/C++ files we dumped into the library
directory, so there is little to do with the Arduino tool when accessing these libraries
other than including the header in your program.
graphics with a tile resolution of 32x24. However, the tile engine has extra
features for more graphically oriented tile graphics and gaming applications.
- Main C file source for “NTSC” module.
- Header file for “VGA” module.
- Main C file source for “GFX” module.
- Header file for “VGA” module.
© 2009 NURVE NETWORKS LLC “Exploring the Chameleon AVR 8-Bit”
175
Related parts for Chameleon-AVR
Image
Part Number
Description
Manufacturer
Datasheet
Request
R

Part Number:
Description:
MCU, MPU & DSP Development Tools PIC24 & PROPELLER DEV SYSTEM (SBC)
Manufacturer:
Nurve Networks
Datasheet:

Part Number:
Description:
MCU, MPU & DSP Development Tools AVR8 VIDEO GAME DEV SYSTEM (SBC)
Manufacturer:
Nurve Networks

Part Number:
Description:
MCU, MPU & DSP Development Tools PIC24 VIDEO GAME DEV SYSTEM (SBC)
Manufacturer:
Nurve Networks