Chameleon-AVR Nurve Networks, Chameleon-AVR Datasheet - Page 79
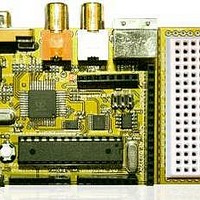
Chameleon-AVR
Manufacturer Part Number
Chameleon-AVR
Description
MCU, MPU & DSP Development Tools AVR8 & PROPELLER DEV SYSTEM (SBC)
Manufacturer
Nurve Networks
Datasheet
1.CHAMELEON-AVR.pdf
(268 pages)
Specifications of Chameleon-AVR
Processor To Be Evaluated
AVR 328P
Data Bus Width
8 bit
Interface Type
USB, VGA, PS/2, I2C, ISP, SPI
Operating Supply Voltage
3.3 V, 5 V
Lead Free Status / RoHS Status
Lead free / RoHS Compliant


© 2009 NURVE NETWORKS LLC “Exploring the Chameleon AVR 8-Bit”
Figure 15.4 – AVR Studio installation directory selection.
I highly recommend you select a “shallow” installation directory for the files. In other words, don’t put the installation in a
long path with many sub-directories. I would install the software right off the root of one of your drives. This way, it’s easy
to type the path for command line applications. Moreover, use “\AVR” in the suffix of the path for convention purposes,
makes it easier to find the installation. Finally, avoid spaces in your directory names and I suggest not using drive C:\, the
less you put on your OS drive the better. You ever wonder why Windows gets slow after a while? The reason is that there
are so many files on the install drive, DLLs in the Windows directory, etc. that the performance of Windows grinds to a
halt. So anytime you can put apps on another drive or partition that’s your best bet. “My Programs” is cute for soccer
moms, but to be avoided as an installation target for serious programmers. Once you have selected the desired
installation directory go ahead and press <Next> to continue the installation process.
Figure 15.5 – AVR Studio extra installation features dialog.
Figure 15.5 shows the AVR Studio features installation dialog. As you can see, there’s not many features. Actually, they
all come by default. In any event, select the USB driver upgrade to save you the time of installing it later. This option
includes the needed driver for any external USB based programmer/debugger which we need. Press <Next> and the
final installation confirmation dialog will display as shown in Figure 15.6.
79
Related parts for Chameleon-AVR
Image
Part Number
Description
Manufacturer
Datasheet
Request
R

Part Number:
Description:
MCU, MPU & DSP Development Tools PIC24 & PROPELLER DEV SYSTEM (SBC)
Manufacturer:
Nurve Networks
Datasheet:

Part Number:
Description:
MCU, MPU & DSP Development Tools AVR8 VIDEO GAME DEV SYSTEM (SBC)
Manufacturer:
Nurve Networks

Part Number:
Description:
MCU, MPU & DSP Development Tools PIC24 VIDEO GAME DEV SYSTEM (SBC)
Manufacturer:
Nurve Networks