XCV50-6TQ144C Xilinx Inc, XCV50-6TQ144C Datasheet - Page 16
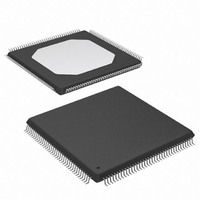
XCV50-6TQ144C
Manufacturer Part Number
XCV50-6TQ144C
Description
IC FPGA 2.5V C-TEMP 144-TQFP
Manufacturer
Xilinx Inc
Series
Virtex™r
Datasheet
1.XCV100-5PQ240C.pdf
(76 pages)
Specifications of XCV50-6TQ144C
Number Of Logic Elements/cells
1728
Number Of Labs/clbs
384
Total Ram Bits
32768
Number Of I /o
98
Number Of Gates
57906
Voltage - Supply
2.375 V ~ 2.625 V
Mounting Type
Surface Mount
Operating Temperature
0°C ~ 85°C
Package / Case
144-LQFP
Case
TQFP144
Dc
03+
Lead Free Status / RoHS Status
Contains lead / RoHS non-compliant
Available stocks
Company
Part Number
Manufacturer
Quantity
Price
Company:

Part Number:
XCV50-6TQ144C
Manufacturer:
XIL
Quantity:
1 238
Company:
Part Number:
XCV50-6TQ144C
Manufacturer:
XILINX
Quantity:
988


Virtex™ 2.5 V Field Programmable Gate Arrays
Configuration
Virtex devices are configured by loading configuration data
into the internal configuration memory. Some of the pins
used for this are dedicated configuration pins, while others
can be re-used as general purpose inputs and outputs once
configuration is complete.
The following are dedicated pins:
•
•
•
•
•
Depending on the configuration mode chosen, CCLK can
be an output generated by the FPGA, or it can be generated
externally and provided to the FPGA as an input. The
PROGRAM pin must be pulled High prior to reconfiguration.
Note that some configuration pins can act as outputs. For
correct operation, these pins can require a V
permit LVTTL operation. All the pins affected are in banks 2
or 3. The configuration pins needed for SelectMap (CS,
Write) are located in bank 1.
Table 7: Configuration Codes
Slave-Serial Mode
In slave-serial mode, the FPGA receives configuration data
in bit-serial form from a serial PROM or other source of
serial configuration data. The serial bitstream must be setup
at the DIN input pin a short time before each rising edge of
an externally generated CCLK.
For more information on serial PROMs, see the PROM data
sheet at:
http://www.xilinx.com/bvdocs/publications/ds026.pdf.
Multiple FPGAs can be daisy-chained for configuration from a
single source. After a particular FPGA has been configured,
the data for the next device is routed to the DOUT pin. The
data on the DOUT pin changes on the rising edge of CCLK.
The change of DOUT on the rising edge of CCLK differs
from previous families, but does not cause a problem for
Module 2 of 4
12
Master-serial mode
Boundary-scan mode
SelectMAP mode
Slave-serial mode
Master-serial mode
Boundary-scan mode
SelectMAP mode
Slave-serial mode
Configuration Mode
Mode pins (M2, M1, M0)
Configuration clock pin (CCLK)
PROGRAM pin
DONE pin
Boundary-scan pins (TDI, TDO, TMS, TCK)
M2
0
1
1
1
1
0
0
0
M1
0
0
1
1
0
0
1
1
M0
0
1
0
1
0
1
0
1
CCO
CCLK Direction
of 3.3 V to
Out
N/A
Out
N/A
In
In
In
In
www.xilinx.com
1-800-255-7778
After Virtex devices are configured, unused IOBs function
as 3-state OBUFTs with weak pull downs. For a more
detailed description than that given below, see the
XAPP138, Virtex Configuration and Readback.
Configuration Modes
Virtex supports the following four configuration modes.
•
•
•
•
The Configuration mode pins (M2, M1, M0) select among
these configuration modes with the option in each case of
having the IOB pins either pulled up or left floating prior to
configuration. The selection codes are listed in
Configuration through the boundary-scan port is always
available, independent of the mode selection. Selecting the
boundary-scan mode simply turns off the other modes. The
three mode pins have internal pull-up resistors, and default
to a logic High if left unconnected. However, it is recom-
mended to drive the configuration mode pins externally.
mixed configuration chains. This change was made to
improve serial configuration rates for Virtex-only chains.
Figure 12
in slave-serial mode should be connected as shown in the
third device from the left.
Slave-serial mode is selected by applying <111> or <011>
to the mode pins (M2, M1, M0). A weak pull-up on the mode
pins makes slave-serial the default mode if the pins are left
unconnected. However, it is recommended to drive the con-
figuration
slave-serial mode programming switching characteristics.
Table 8
shown in
INIT pins of all daisy-chained FPGAs are High.
Data Width
Slave-serial mode
Master-serial mode
SelectMAP mode
Boundary-scan mode
1
1
8
1
1
1
8
1
provides more detail about the characteristics
Figure
shows a full master/slave system. A Virtex device
mode
Serial D
13. Configuration must be delayed until the
Yes
Yes
Yes
Yes
pins
No
No
No
No
out
DS003-2 (v2.8.1) December 9, 2002
externally.
Configuration Pull-ups
Product Specification
Figure 13
Yes
Yes
Yes
Yes
No
No
No
No
Table
shows
7.
R
Related parts for XCV50-6TQ144C
Image
Part Number
Description
Manufacturer
Datasheet
Request
R

Part Number:
Description:
IC FPGA 2.5V 57K GATES 256-PBGA
Manufacturer:
Xilinx Inc
Datasheet:

Part Number:
Description:
IC FPGA 2.5V 57K GATES 240-PQFP
Manufacturer:
Xilinx Inc
Datasheet:
Part Number:
Description:
IC FPGA 2.5V C-TEMP 144-CSA
Manufacturer:
Xilinx Inc
Datasheet:

Part Number:
Description:
IC FPGA 2.5V C-TEMP 144-TQFP
Manufacturer:
Xilinx Inc
Datasheet:
Part Number:
Description:
IC FPGA 2.5V I-TEMP 144-CSA
Manufacturer:
Xilinx Inc
Datasheet:
Part Number:
Description:
IC FPGA 2.5V C-TEMP 144-CSA
Manufacturer:
Xilinx Inc
Datasheet:
Part Number:
Description:
IC FPGA 2.5V C-TEMP 256-PBGA
Manufacturer:
Xilinx Inc
Datasheet:
Part Number:
Description:
IC FPGA 2.5V C-TEMP 256-FBGA
Manufacturer:
Xilinx Inc
Datasheet:
Part Number:
Description:
IC FPGA 2.5V I-TEMP 144-TQFP
Manufacturer:
Xilinx Inc
Datasheet:
Part Number:
Description:
IC FPGA 2.5V C-TEMP 144-TQFP
Manufacturer:
Xilinx Inc
Datasheet:
Part Number:
Description:
IC FPGA 2.5V C-TEMP 240-PQFP
Manufacturer:
Xilinx Inc
Datasheet:
Part Number:
Description:
IC FPGA 2.5V I-TEMP 144-CSA
Manufacturer:
Xilinx Inc
Datasheet:
Part Number:
Description:
IC FPGA 2.5V I-TEMP 256-PBGA
Manufacturer:
Xilinx Inc
Datasheet:
Part Number:
Description:
IC FPGA 2.5V I-TEMP 256-FBGA
Manufacturer:
Xilinx Inc
Datasheet:
Part Number:
Description:
IC FPGA 2.5V C-TEMP 256-FBGA
Manufacturer:
Xilinx Inc
Datasheet: