ATMEGA16HVA-4CKU Atmel, ATMEGA16HVA-4CKU Datasheet - Page 157
ATMEGA16HVA-4CKU
Manufacturer Part Number
ATMEGA16HVA-4CKU
Description
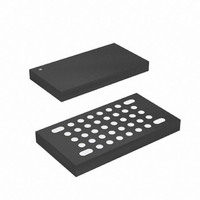
MCU AVR 16K FLASH 4MHZ 36-LGA
Manufacturer
Atmel
Series
AVR® ATmegar
Datasheet
1.ATMEGA16HVA-4CKU.pdf
(196 pages)
Specifications of ATMEGA16HVA-4CKU
Core Processor
AVR
Core Size
8-Bit
Speed
4MHz
Connectivity
SPI
Peripherals
Brown-out Detect/Reset, POR, PWM, WDT
Number Of I /o
7
Program Memory Size
16KB (8K x 16)
Program Memory Type
FLASH
Eeprom Size
256 x 8
Ram Size
512 x 8
Voltage - Supply (vcc/vdd)
1.8 V ~ 9 V
Data Converters
A/D 5x12b
Oscillator Type
External
Operating Temperature
-20°C ~ 85°C
Package / Case
36-LGA
Processor Series
ATMEGA16x
Core
AVR8
Data Bus Width
8 bit
Data Ram Size
512 B
Interface Type
SPI
Maximum Clock Frequency
4 MHz
Number Of Programmable I/os
6
Number Of Timers
2
Maximum Operating Temperature
+ 85 C
Mounting Style
SMD/SMT
3rd Party Development Tools
EWAVR, EWAVR-BL
Development Tools By Supplier
ATAVRDRAGON, ATSTK500, ATSTK600, ATAVRISP2, ATAVRONEKIT, ATAVRSB200, ATAVRSB201
Minimum Operating Temperature
- 20 C
On-chip Adc
12 bit, 5 Channel
For Use With
ATSTK600 - DEV KIT FOR AVR/AVR32ATSTK500 - PROGRAMMER AVR STARTER KIT
Lead Free Status / RoHS Status
Lead free / RoHS Compliant


27.8
27.8.1
27.8.2
8024A–AVR–04/08
High-voltage Serial Programming Algorithm
Enter High-voltage Serial Programming Mode
Considerations for Efficient Programming
To program and verify the ATmega8HVA/16HVA in the High-voltage Serial Programming mode,
the following sequence is recommended (See instruction formats in
The following algorithm puts the device in Serial (High-voltage) Programming mode:
1. Set Prog_enable pins listed in
2. Apply 3.0 - 3.5V between V
3. Wait 20 - 60 µs, and apply V
4. Keep the Prog_enable pins unchanged for at least t
5. Release Prog_enable[1] pin to avoid drive contention on the Prog_enable[1]/SDO pin.
6. Wait at least 300 µs before giving any serial instructions on SDI/SII.
If the rise time of the V
tive algorithm can be used.
1. Set Prog_enable pins listed in
2. Apply 3.0 - 3.5V between V
3. Monitor V
4. Keep the Prog_enable pins unchanged for at least t
5. Release Prog_enable[1] pin to avoid drive contention on the Prog_enable[1]/SDO pin.
6. Wait until V
Table 27-13. High-voltage Reset Characteristics
The loaded command and address are retained in the device during programming. For efficient
programming, the following should be considered.
• The command needs only be loaded once when writing or reading multiple memory locations.
• Skip writing the data value 0xFF that is the contents of the entire EEPROM (unless the
• Address High byte needs only be loaded before programming or reading a new 256 word
EESAVE Fuse is programmed) and Flash after a Chip Erase.
window in Flash or 256 byte EEPROM. This consideration also applies to Signature bytes
reading.
Supply Voltage
V
next 20 µs.
applied to ensure the Prog_enable Signature has been latched.
V
applied to ensure the Prog_enable Signature has been latched.
CC
CC
3.0V
3.5V
V
to 0V.
to 0V.
CC
CC
CC
, and as soon as V
actually reaches 3.0 - 3.5V before giving any serial instructions on SDI/SII.
RESET Pin High-voltage Threshold
CC
is unable to fulfill the requirements listed above, the following alterna-
CC
CC
HRST
and GND. Ensure that V
Table 27-12 on page 156
Table 27-12 on page 156
and GND.
CC
V
11.5V
11.5V
HVRST
- 12.5V to RESET.
reaches 0.9 - 1.1V, apply V
ATmega8HVA/16HVA
HVRST
HVRST
CC
to “0000”, RESET pin to 0V and
to “0000”, RESET pin to 0V and
after the High-voltage has been
after the High-voltage has been
reaches at least 1.8V within the
Minimum High-voltage Period for
HRST
Latching Prog_enable
Table
- 12.5V to RESET.
27-14):
t
10 µs
10 µs
HVRST
157
Related parts for ATMEGA16HVA-4CKU
Image
Part Number
Description
Manufacturer
Datasheet
Request
R

Part Number:
Description:
DEV KIT FOR AVR/AVR32
Manufacturer:
Atmel
Datasheet:

Part Number:
Description:
INTERVAL AND WIPE/WASH WIPER CONTROL IC WITH DELAY
Manufacturer:
ATMEL Corporation
Datasheet:
Part Number:
Description:
Low-Voltage Voice-Switched IC for Hands-Free Operation
Manufacturer:
ATMEL Corporation
Datasheet:
Part Number:
Description:
MONOLITHIC INTEGRATED FEATUREPHONE CIRCUIT
Manufacturer:
ATMEL Corporation
Datasheet:
Part Number:
Description:
AM-FM Receiver IC U4255BM-M
Manufacturer:
ATMEL Corporation
Datasheet:
Part Number:
Description:
Monolithic Integrated Feature Phone Circuit
Manufacturer:
ATMEL Corporation
Datasheet:
Part Number:
Description:
Multistandard Video-IF and Quasi Parallel Sound Processing
Manufacturer:
ATMEL Corporation
Datasheet:
Part Number:
Description:
High-performance EE PLD
Manufacturer:
ATMEL Corporation
Datasheet:
Part Number:
Description:
8-bit Flash Microcontroller
Manufacturer:
ATMEL Corporation
Datasheet:
Part Number:
Description:
2-Wire Serial EEPROM
Manufacturer:
ATMEL Corporation
Datasheet: