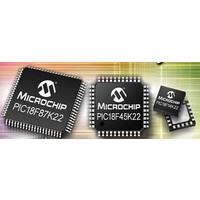
PIC18F46K22-I/MV Microchip Technology, PIC18F46K22-I/MV Datasheet - Page 320

PIC18F46K22-I/MV
Manufacturer Part Number
PIC18F46K22-I/MV
Description
64KB, Flash, 3968bytes-RAM,8-bit Family,nanoWatt XLP 40 UQFN 5x5x0.5mm TUBE
Manufacturer
Microchip Technology
Series
PIC® XLP™ 18Fr
Datasheet
1.PIC18F26J13-ISS.pdf
(496 pages)
Specifications of PIC18F46K22-I/MV
Core Processor
PIC
Core Size
8-Bit
Speed
64MHz
Connectivity
I²C, SPI, UART/USART
Peripherals
Brown-out Detect/Reset, HLVD, POR, PWM, WDT
Number Of I /o
35
Program Memory Size
64KB (32K x 16)
Program Memory Type
FLASH
Eeprom Size
1K x 8
Ram Size
3.8K x 8
Voltage - Supply (vcc/vdd)
1.8 V ~ 5.5 V
Data Converters
A/D 30x10b
Oscillator Type
Internal
Operating Temperature
-40°C ~ 85°C
Package / Case
40-UFQFN Exposed Pad
Processor Series
PIC18F
Core
PIC
Data Bus Width
8 bit
Data Ram Size
4 KB
Number Of Programmable I/os
36
Number Of Timers
3 x 8-bit. 4 x 16-bit
Operating Supply Voltage
1.8 V to 5.5 V
Mounting Style
SMD/SMT
Lead Free Status / RoHS Status
Lead free / RoHS Compliant
Lead Free Status / RoHS Status
Lead free / RoHS Compliant
- Current page: 320 of 496
- Download datasheet (5Mb)
capacitance, and the added capacitance of the human
PIC18(L)F2X/4XK22
19.3
The
measurements of capacitance and time, as well as for
accurate time delay. If the application only requires
measurement of a relative change in capacitance or
time, calibration is usually not necessary. An example of
this type of application would include a capacitive touch
switch, in which the touch circuit has a baseline
body changes the overall capacitance of a circuit.
If actual capacitance or time measurement is required,
two hardware calibrations must take place: the current
source needs calibration to set it to a precise current,
and the circuit being measured needs calibration to
measure and/or nullify all other capacitance other than
that to be measured.
19.3.1
The current source on board the CTMU module has a
range of ±60% nominal for each of three current
ranges. Therefore, for precise measurements, it is
possible to measure and adjust this current source by
placing a high precision resistor, R
analog channel. An example circuit is shown in
Figure
performed using the following steps:
1.
2.
3.
4.
5.
6.
The CTMU current source may be trimmed with the
trim bits in CTMUICON using an iterative process to get
an exact desired current. Alternatively, the nominal
value without adjustment may be used; it may be
stored by the software for use in all subsequent
capacitive or time measurements.
To calculate the value for R
must be chosen, and then the resistance can be
calculated. For example, if the A/D Converter reference
voltage is 3.3V, use 70% of full scale, or 2.31V as the
desired approximate voltage to be read by the A/D
Converter. If the range of the CTMU current source is
selected to be 0.55 A, the resistor value needed is cal-
culated as R
Similarly, if the current source is chosen to be 5.5 A,
R
source is set to 55 A.
DS41412D-page 320
CAL
Initialize the A/D Converter.
Initialize the CTMU.
Enable
EDG1STAT (CTMUCONL<0>).
Issue settling time delay.
Perform A/D conversion.
Calculate the current source current using
I = V/ R
resistance and V is measured by performing an
A/D conversion.
would be 420,000Ω, and 42,000Ω if the current
CTMU
19-2. The current source measurement is
Calibrating the CTMU Module
CURRENT SOURCE CALIBRATION
CAL
CAL
the
, where R
= 2.31V/0.55 A, for a value of 4.2 MΩ.
requires
current
CAL
calibration
CAL
source
is a high precision
, the nominal current
CAL
, onto an unused
by
for
setting
precise
Preliminary
FIGURE 19-2:
A value of 70% of full-scale voltage is chosen to make
sure that the A/D Converter was in a range that is well
above the noise floor. Keep in mind that if an exact cur-
rent is chosen, that is to incorporate the trimming bits
from CTMUICON, the resistor value of R
to be adjusted accordingly. R
to allow for available resistor values. R
the highest precision available, keeping in mind the
amount of precision needed for the circuit that the
CTMU will be used to measure. A recommended
minimum would be 0.1% tolerance.
The following examples show one typical method for
performing a CTMU current calibration.
demonstrates how to initialize the A/D Converter and
the CTMU; this routine is typical for applications using
both modules.
method for the actual calibration routine.
ANx
R
CAL
Example 19-2
CTMU CURRENT SOURCE
CALIBRATION CIRCUIT
PIC18(L)FXXK22 Device
Current Source
2010 Microchip Technology Inc.
MUX
CAL
A/D Converter
may also be adjusted
demonstrates one
A/D
CAL
CTMU
CAL
Example 19-1
should be of
may need
Related parts for PIC18F46K22-I/MV
Image
Part Number
Description
Manufacturer
Datasheet
Request
R

Part Number:
Description:
Manufacturer:
Microchip Technology Inc.
Datasheet:

Part Number:
Description:
Manufacturer:
Microchip Technology Inc.
Datasheet:

Part Number:
Description:
Manufacturer:
Microchip Technology Inc.
Datasheet:

Part Number:
Description:
Manufacturer:
Microchip Technology Inc.
Datasheet:

Part Number:
Description:
Manufacturer:
Microchip Technology Inc.
Datasheet:

Part Number:
Description:
Manufacturer:
Microchip Technology Inc.
Datasheet:

Part Number:
Description:
Manufacturer:
Microchip Technology Inc.
Datasheet:

Part Number:
Description:
Manufacturer:
Microchip Technology Inc.
Datasheet:


