R5F2L3AAANFP#U1 Renesas Electronics America, R5F2L3AAANFP#U1 Datasheet - Page 148
R5F2L3AAANFP#U1
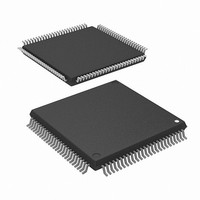
Manufacturer Part Number
R5F2L3AAANFP#U1
Description
MCU FLASH 96+4KB 100LQFP
Manufacturer
Renesas Electronics America
Series
R8C/Lx/3AAr
Datasheet
1.R5F2L387ANFPU1.pdf
(864 pages)
Specifications of R5F2L3AAANFP#U1
Core Processor
R8C
Core Size
16/32-Bit
Speed
20MHz
Connectivity
I²C, LIN, SIO, SSU, UART/USART
Peripherals
LCD, POR, PWM, Voltage Detect, WDT
Number Of I /o
88
Program Memory Size
96KB (96K x 8)
Program Memory Type
FLASH
Ram Size
10K x 8
Voltage - Supply (vcc/vdd)
1.8 V ~ 5.5 V
Data Converters
A/D 20x10b; D/A 2x8b
Oscillator Type
Internal
Operating Temperature
-20°C ~ 85°C
Package / Case
100-LQFP
Lead Free Status / RoHS Status
Lead free / RoHS Compliant
Eeprom Size
-
Available stocks
Company
Part Number
Manufacturer
Quantity
Price


R8C/L35A Group, R8C/L36A Group, R8C/L38A Group, R8C/L3AA Group,
R8C/L35B Group, R8C/L36B Group, R8C/L38B Group, R8C/L3AB Group
REJ09B0441-0100 Rev.1.00
Page 111 of 802
8.2
8.2.1
Notes:
1. The CM05 bit can be used to stop the XIN clock when the system clock is other than the XIN clock. This bit
2. During external clock input, only the clock oscillation buffer stops and clock input is acknowledged.
3. Only when the CM05 bit to 1 (XIN clock stops) and the CM07 bit is set to 1 (XCIN clock), P12_0 and P12_1 can
4. When the MCU enters stop mode, the CM06 bit is set to 1 (divide-by-8 mode).
5. Set the CM07 bit to 1 (XCIN clock) from 0 after allowing the XCIN clock oscillation to stabilize.
6. To use the XCIN clock, set the CM03 bit to 1 once and then set it to 0 (XCIN clock oscillates) after turning on the
After Reset
Bit
b0
b1
b2
b3
b4
b5
b6
b7
Address 0006h
cannot be used to detect whether the XIN clock has stopped. To stop the XIN clock, set the bits in the following
order:
(a) Set bits OCD1 to OCD0 in the OCD register to 00b.
(b) Set the OCD2 bit to 1 (on-chip oscillator clock selected).
be used as I/O ports.
The P12_0 pin is shared with the XIN pin, and the P12_1 pin is shared with the XOUT pin. These pins cannot be
used as I/O ports when using the XIN clock.
power. To use the VL1 internally-generated voltage in the LCD drive control circuit, set the LVURS bit in the
LCR1 register to 1 (VL1 internally-generated voltage) after the above setting.
Set the PRC0 bit in the PRCR register to 1 (write enabled) before rewriting the CM0 register.
Symbol
Registers
Symbol
CM01 Peripheral function clock stop bit in
CM02
CM03 XCIN clock stop bit
CM04 XCIN external clock input enable bit 0: External clock input disabled
CM05 XIN clock (XIN-XOUT) stop bit
CM06 CPU clock division select bit 0
CM07 System clock select bit
Bit
—
System Clock Control Register 0 (CM0)
CM07
Reserved bit
wait mode
b7
0
CM06
b6
0
Bit Name
Oct 30, 2009
(6)
CM05
b5
1
(5)
(4)
CM04
(1, 3)
b4
0
Set to 0.
0: XCIN clock oscillates
1: XCIN clock stops
1: External clock input enabled
0: XIN clock oscillates
1: XIN clock stops
0: Bits CM16 and CM17 in CM1 register enabled
1: Divide-by-8 mode
0: XIN clock or on-chip oscillator clock
1: XCIN clock
b1 b0
0 0: Peripheral function clock does not stop in
0 1: Clocks f1 to f32 stop in wait mode
1 0: Clocks f1 to f32 and fC stop in wait mode
1 1: Clocks f1 to f32, fC, and fC-LCD stop in wait mode
CM03
wait mode
b3
0
CM02
b2
0
(2)
Function
CM01
b1
0
8. Clock Generation Circuit
b0
—
0
R/W
R/W
R/W
R/W
R/W
R/W
R/W
R/W
R/W
Related parts for R5F2L3AAANFP#U1
Image
Part Number
Description
Manufacturer
Datasheet
Request
R

Part Number:
Description:
KIT STARTER FOR M16C/29
Manufacturer:
Renesas Electronics America
Datasheet:

Part Number:
Description:
KIT STARTER FOR R8C/2D
Manufacturer:
Renesas Electronics America
Datasheet:

Part Number:
Description:
R0K33062P STARTER KIT
Manufacturer:
Renesas Electronics America
Datasheet:

Part Number:
Description:
KIT STARTER FOR R8C/23 E8A
Manufacturer:
Renesas Electronics America
Datasheet:

Part Number:
Description:
KIT STARTER FOR R8C/25
Manufacturer:
Renesas Electronics America
Datasheet:

Part Number:
Description:
KIT STARTER H8S2456 SHARPE DSPLY
Manufacturer:
Renesas Electronics America
Datasheet:

Part Number:
Description:
KIT STARTER FOR R8C38C
Manufacturer:
Renesas Electronics America
Datasheet:

Part Number:
Description:
KIT STARTER FOR R8C35C
Manufacturer:
Renesas Electronics America
Datasheet:

Part Number:
Description:
KIT STARTER FOR R8CL3AC+LCD APPS
Manufacturer:
Renesas Electronics America
Datasheet:
Part Number:
Description:
KIT STARTER FOR RX610
Manufacturer:
Renesas Electronics America
Datasheet:

Part Number:
Description:
KIT STARTER FOR R32C/118
Manufacturer:
Renesas Electronics America
Datasheet:

Part Number:
Description:
KIT DEV RSK-R8C/26-29
Manufacturer:
Renesas Electronics America
Datasheet:

Part Number:
Description:
KIT STARTER FOR SH7124
Manufacturer:
Renesas Electronics America
Datasheet:

Part Number:
Description:
KIT STARTER FOR H8SX/1622
Manufacturer:
Renesas Electronics America
Datasheet:

Part Number:
Description:
KIT DEV FOR SH7203
Manufacturer:
Renesas Electronics America
Datasheet: